Showing posts with label Challenge. Show all posts

Tuesday, May 6, 2014

Progressive Sun Exposure

First off, let me just say, MY HAS IT BEEN A WHILE!!

I won't apologize, because I am not sorry--I was investing some time into my girls, my family and friends (close and far), and making a little anniversary magic...it was on the 1st of May. This year was themed the traditional flowers and/or fruit, and boy have these fingers been full of creative power! So excuse me for disappearing for so long!!

So while the sun is shining, I am constantly thinking about little babes and sunburns, so I thought I would share my sun"screen" regimen with you. I get asked about it A LOT, and I feel it's important...but I MUST start off with a disclaimer: My recommendations are in no way the substitute for medical advice, and I cannot guarantee that my method works with all skin types or conditions, please consult your physician if you have any concerns. This is just what works for my family.

We start in March, when the weather hits about 55 degrees around here, we pull on our boots and head outside where the shirts come off! The first initiative of Progressive Sun Exposure is to do exactly that, EXPOSE your skin to the sun when it is weakest. In the earliest parts of warm spring I allow my children to run around topless between the hours of 10 and 12 for the entire duration of TWO hours. In the evening, when the girls are up from their naps, and the day has warmed considerably, I stick their little booties in shorts and short-sleeved shirts (if it seems a little too cold yet, I leave their top halves in long sleeves), then we head back outside for another hour or so. This is the perfect point to gauge their skin! If they look a little "warm" when your child is usually pasty, hold off on the evening sunbathing! Then continue in this fashion through April, which will only end up being a couple times a week because of all the April showers! Just be diligent, as if you were a farmer who HAS to go outside daily to tend crops. Sometimes it can be a challenge to get out there unless the sunshine is irresistible, but there is nothing more beautiful than a body in sync with nature, skin tone obviously kissed by the sun!

I understand that the noon hour can be concerning, because between 11 and 2 the sun's rays are strongest, and normally I would recommend avoiding those hours, but since you're starting in the earliest parts of spring, I have never known the rays to be quite strong enough to burn, unless you're prolonging your exposure past noon...then you're just not following directions, and you are on your own! Still, for the fairer skin types, there are two ways to go about it.

The first way, which is easiest for me:
10-12 shirtless...
4-6 shorts and short sleeves
On any day the sun doth shine! Until May 1st. Then move the hour back to 9-11.
If you're in the water, halve your duration of exposure.

The second way, for babes under 2 and fair-skinned folk: (also helpful for late starters)
Avoiding the sun's witching hours from 11-2, expose as much skin as possible for 20 minutes.
Every 3 days of exposure add 10 minutes.
If that tell-tale pink glow appears, rest, out of the sun, for at least 2 days before resuming, and consider giving your skin a longer adjustment period, such as 4 or 5 days of the same length of exposure, especially when you hit lengths of an hour or more.
River Evelyn 1 and a few months old!


Now, why wouldn't you just use sunscreen and save yourself the trouble? I've been asked a thousand times. Because the ingredients in most sunscreens are carcinogenic, cancer-CAUSING...your great-great grandma didn't have access to sunscreen, and neither do peasants and farmers in present-day countries, such as China, and wouldn't you know it?! Their SKIN cancer levels are markedly LOW!! (Don't bring up Australia, our poor friends down under don't count!) So what about using natural sunscreen? That's decidedly better, but still,
"Vitamin D: it protects against many types of cancer, including skin cancer. Supplementation is in order for people who live in areas with long winters and/or people who do not take sunbaths."(Drake)


River, and Kaylee age 2.5. My babes NEVER burned last year!! They got close once, and we used sunscreen one time when we were in a pool that did not open until 11.

Now tell me, why would I hide my children from the glorious sunshine that God so lovingly made for us to enjoy, and mask them with man-made lotions? When it comes down to it, I always pick God-made over man-made, unless I'm treating a man-made problem with a man-made solution. Plus studies are showing that sunscreen may block rays from damaging the skin, but they do not prevent the rays from penetrating it, causing free radicals to form. So not only are you blocking your body from making Vitamin D to help deal with the free radicals, but you are also taking in the UVA rays anyway, and you are more likely to stay outside longer in this condition, thinking you are protected. (BBC News)


Low levels of Vitamin D are linked to many types of cancer; colorectal, breast cancer, renal, endometrial, colon...etc. Getting your levels above 30 is recommended, and above 60 diminishes your cancer risks by 3/4!! Even Canada has started prescribing Vitamin D to prevent cancer.(Nikoley) The following graphs relating Vitamin D levels to various cancer risks are taken from Free The Animal:


Notice how the USA is markedly above the projected incidence rate of Renal Cancer relative to it's average global latitude position...WE ARE DOING SOMETHING WRONG HERE FOLKS!!!


My girls, in early April!

Progressive Sun Exposure not only exposes the skin to the sun, but also incorporates diet into the method, keeping skin healthy, vibrant and producing Vitamin D instead of constantly repairing skin damage. 


Sure, increasing sun exposure steadily will help your skin adapt to the sun, but your body will have a much easier time if you give it a break from fighting toxins in fast food, and help it along with natural dietary changes to boost skin protection and rejuvenation!


First, and I can't stress this enough, WATER!!! The more hydrated your skin, the more the sun can evaporate before hitting dry tissue. Dry tissue is damaged tissue.


Secondly, look around you! What's in season?? BERRIES!!! Especially BLUEBERRIES!! In the PEAK of summer, berries are abundant, and they just so happen to contain hundreds of antioxidants and other nutrients and vitamins that aid your skin among other things! There are also plenty of tomatoes, watermelon and dark leafy greens!


In addition to tomatoes and watermelon, some other specific fruits, to pick the best out of the abundance: Pomegranate, Broccoli, Spirulina, Red Bell Pepper, Mango, Carrots, Papaya, Cherries, Chocolate. All of these for Vitamin C, Carotenoids, Astaxanthin, Lycopene, Histidines, Anthocyanines, Tocotrienals, Sulphoraphane...all that jargon says HEALTHY SKIN!!!


Also, an in-depth look at how our country's diet has changed over the past few decades--Skin cancer rates have risen annually 4.2% after an initial increase of 77% from 1992-2006, at the same time we are spending less hours in the sun and more of that time in sunscreen. So firstly, we aren't absorbing the sunshine and making Vitamin D, as I mentioned before. Also, we don't eat saturated and monounsaturated fats. We fill our fats with canola oil, veggie and soybean oils, due to the sentiment that these kinds of leaner fats are healthier for you, when in fact it's the saturated fats that help produce healthy skin cells and the other oils that are being used in substitute during cell production can cause skin cancer instead. These oils are also high in linoleic acid which is not only linked to causing skin cancer, but also inhibits the body from effectively fighting cancers too! Other dietary habits to be noted are the higher intake of grains, which cause inflammation in most humans, and the use of chemicals in food (yes, even the lovely artificial sweetener that is 0 calories) and applying chemicals to the skin via cosmetics, hygene products and sunscreen. These products are just acting on the pseudo-skin cells your body created out of fake fats, which are more likely to mutate, so then the constant exposure to the chemicals causes them to do exactly that--MUTATE! Consuming antioxidants, such as the aformentioned berries will get rid of free radicals in the body, but if you don't participate in the dietary behaviors that cause those free radicals to form, you will be MUCH better off! (Katie) 


Kaylee Autumn

Study after study will show you that food is the foundation of natural sunscreen: 2007 Cornell study of Red Delicious apples showed the skin of the apple to contain triterpenoids which block or kill cancer cells; Korean study gave 30 women 30mg of beta-carotene (6 carrots worth/ 1.5 cups, or 1 cup of sweet potatoes) which showed to prevent and reverse photoaging of currently damaged cells. (Goyanes) A University of Michigan study found the Lycopene in tomatoes and watermelon also protect the skin from sunburn after 3 months of daily doses. UC San Diego also found in a study of Green Tea that consuming or applying it directly to your skin will prevent sunburn as well. (Barrymore) Yet another study, this time on chocolate, found that 3 ounces every day for three months not only helped prevent sunburn, but also left skin smoother, moister, and healthier. Even at 6 weeks, the skin reddening was 15% less, and 12 weeks 25% less! (Raloff) You should eat healthily all the time, but if you don't there are supplements that can help you too. Some German scientists studied Beta-Carotene in supplement form and found that taking supplements for at least 10 weeks improved the skin's natural spf. (Although I must stress that supplements can have ill effects compared to their natural form! For example the beta-carotene/Vit A supplement will increase risk of lung cancer in smokers and previous smokers, but not naturally occurring Vitamin A) (European Food Information Council)


To clarify though, I do NOT recommend staying in the sun at noon, I do not recommend sunbathing for infants, because we have thinned our o-zone layer, which is just asking for a sunburn. If you HAVE to be out during those hours, or have a little one who's skin is not developed enough to adapt to sun exposure, please naturally lotion up. There are plenty of natural lotions, so you can avoid the chemicals, but even in the most extreme situations it's better to lather on the chemical crap than to burn. So use common sense! 


Works Cited:


Barrymore, John. "Foods That Prevent Sunburn." HowStuffWorks. 10 Aug 2009.
<http://health.howstuffworks.com/skin-care/beauty/sun-care/how-to-prevent-sunburn2.htm>

BBC News. "Sun Lotions Are Not Effective." 29 Sept 2003.
<http://news.bbc.co.uk/2/hi/health/3142386.stm>

Drake, Karen Sinclair. "Natural Sun Protection." Dr. Frank Lipman. 22 Jul 2011. <http://www.drfranklipman.com/natural-sun-protection/>

European Food Information Council. "Beta-Carotene Supplements May Help Prevent Sunburns." EUFIC. 5 May 2014.
<http://www.eufic.org/page/en/page/LS/fftid/Beta-carotene-supplements-may-help-prevent-sunburns/>

Goyanes, Cristina. "Eat These Sun-Fighting Super Foods." Women's Health. 2014.
<http://www.womenshealthmag.com/beauty/food-for-skin-0>

Harris, Kimi. "Help Prevent Sunburn With These Beautiful Foods." Mother Nature Network. 5 Jul 2012.
<http://www.mnn.com/food/healthy-eating/blogs/help-prevent-sunburn-with-these-beautiful-foods#>

Katie. "Avoid Sunburn and Tan Better by Eating Real Food?" Wellness Mama. 21 Jun 2011.
<http://wellnessmama.com/2619/avoid-sunburn-and-tan-better-by-eating-real-food/>

Nikoley, Richard. "Vitamin D Deficiency and All Cancer." Free The Animal. 30 Dec 2008.
<http://freetheanimal.com/2008/12/vitamin-d-deficiency-and-all-cancer.html>

Raloff, Janet. "Chocolate As Sunscreen." Food For Thought. Science News. 14 Jun 2006.
<https://www.sciencenews.org/blog/food-thought/chocolate-sunscreen-0>

The Seasonal Family. "10 Foods that are Natural Sunscreens." 26 May 2011. <http://www.seasonalfamily.com/2011/05/10-foods-that-are-natural-sunscreens.html>

"Top 10 Foods Highest in Beta-Carotene." Health-Alicious-Ness. 6 Apr 2013.
<http://www.healthaliciousness.com/articles/natural-food-sources-of-beta-carotene.php>

Monday, January 13, 2014

Wondering About That Garbage Challenge? Let's Make Dirt!!!

A couple months ago I presented a garbage challenge, and we approached the issue with just the right amount of recycling, composting/foodcycling, yard waste, and paper burning (yes, that's where all that foil-lined paper went...and a lopsided wicker reindeer!) with utmost fervor to achieve a whopping reduction of a 32gallon can once a WEEK down to a 32gallon can ONCE A MONTH!!!

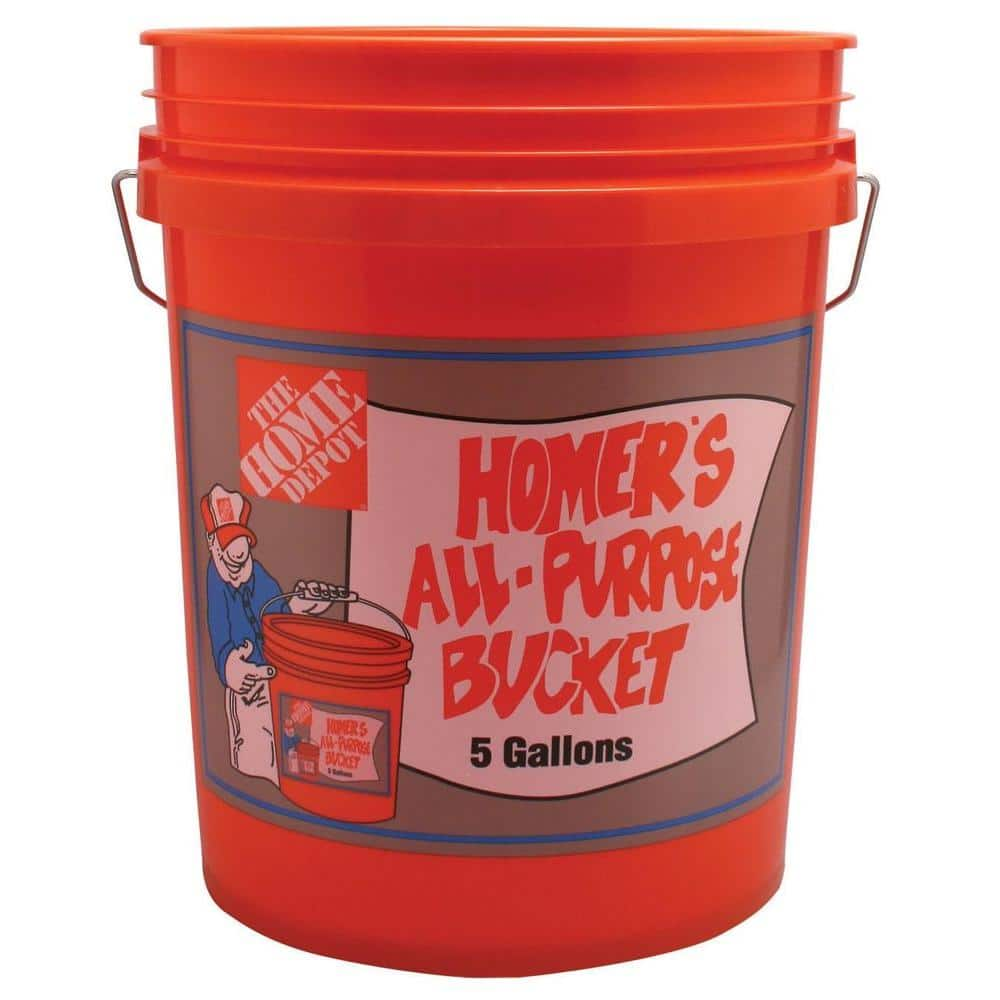
I never thought it was possible, what with two "litter-bug" cats, two babies, and a multitude of Christmas packages! But we did, and it's marvelous! We use our own can that we purchased from Home Depot for $10, and voila, let the savings roll in!

Thank you to those who posted suggestions and encouragement, you were entered into the book drawing, since many of you are unable to reduce your trash impact, I thought I'd encourage right back with a healthy Vegan Cookbook! Now the lucky winner will receive a little kitchen helper, because veggies keep waste output low!


AND THE WONDERFUL, ENCOURAGING WINNER IS...


JOANN HILLHOUSE!!

And no, I promise I didn't rig it, grandma!

But my green-thumb grandma taught me a wonderful trick that helps keep your garden growing strong, and utilizes that lovely compost you are making. I know you've all seen those "grounds for your garden" bags of coffee grounds at Starbucks, or you at least know you can put coffee grounds out in your soil, but how, exactly? 

So we now save our coffee grounds in our cute ceramic compost container, it sits on the counter next to the coffee pot so that we ACTUALLY DO IT! And, I had a little help from Brandan's grandparents, who gave me a whopping 10 # bag of grounds from Starbucks for Christmas!!! Now, you definitely have time to save your grounds from here till Spring to incorporate them, but I'd like to take the opportunity to show you how it's going to look in the end!

First off, you can put coffee grounds directly on hearty rose-family plants: roses, raspberries, cherry trees, and the sort. Otherwise, be cautious, the nitrogen, which is a lovely energy source for worms, will burn your other plants!


And for your listening pleasure, while we're talking dirty, "Worms Eat Dirt" by the Aquabats!! Fun for kids (of all ages)!!!

So I start with a 5 gallon bucket. They are available at any home improvement store-- Home Depot, Ace, Lowes...although Home Depot is cheapest at 2.78 a bucket, Ace's is completely white, so aesthetically more pleasing to the eye! Although theirs is $4 more, so it depends on your budget, and how important it is to you! They're both equal in size, made from the same plastic, and equally water-tight when you purchase the corresponding lid...another buck or so...but for our purposes we don't need a lid on this one!


You will see that my demonstration bucket is white, but I assure you that it is because it was a gift! Although, again prettier, I did purchase my arsenal of buckets for chicken feed in construction orange!


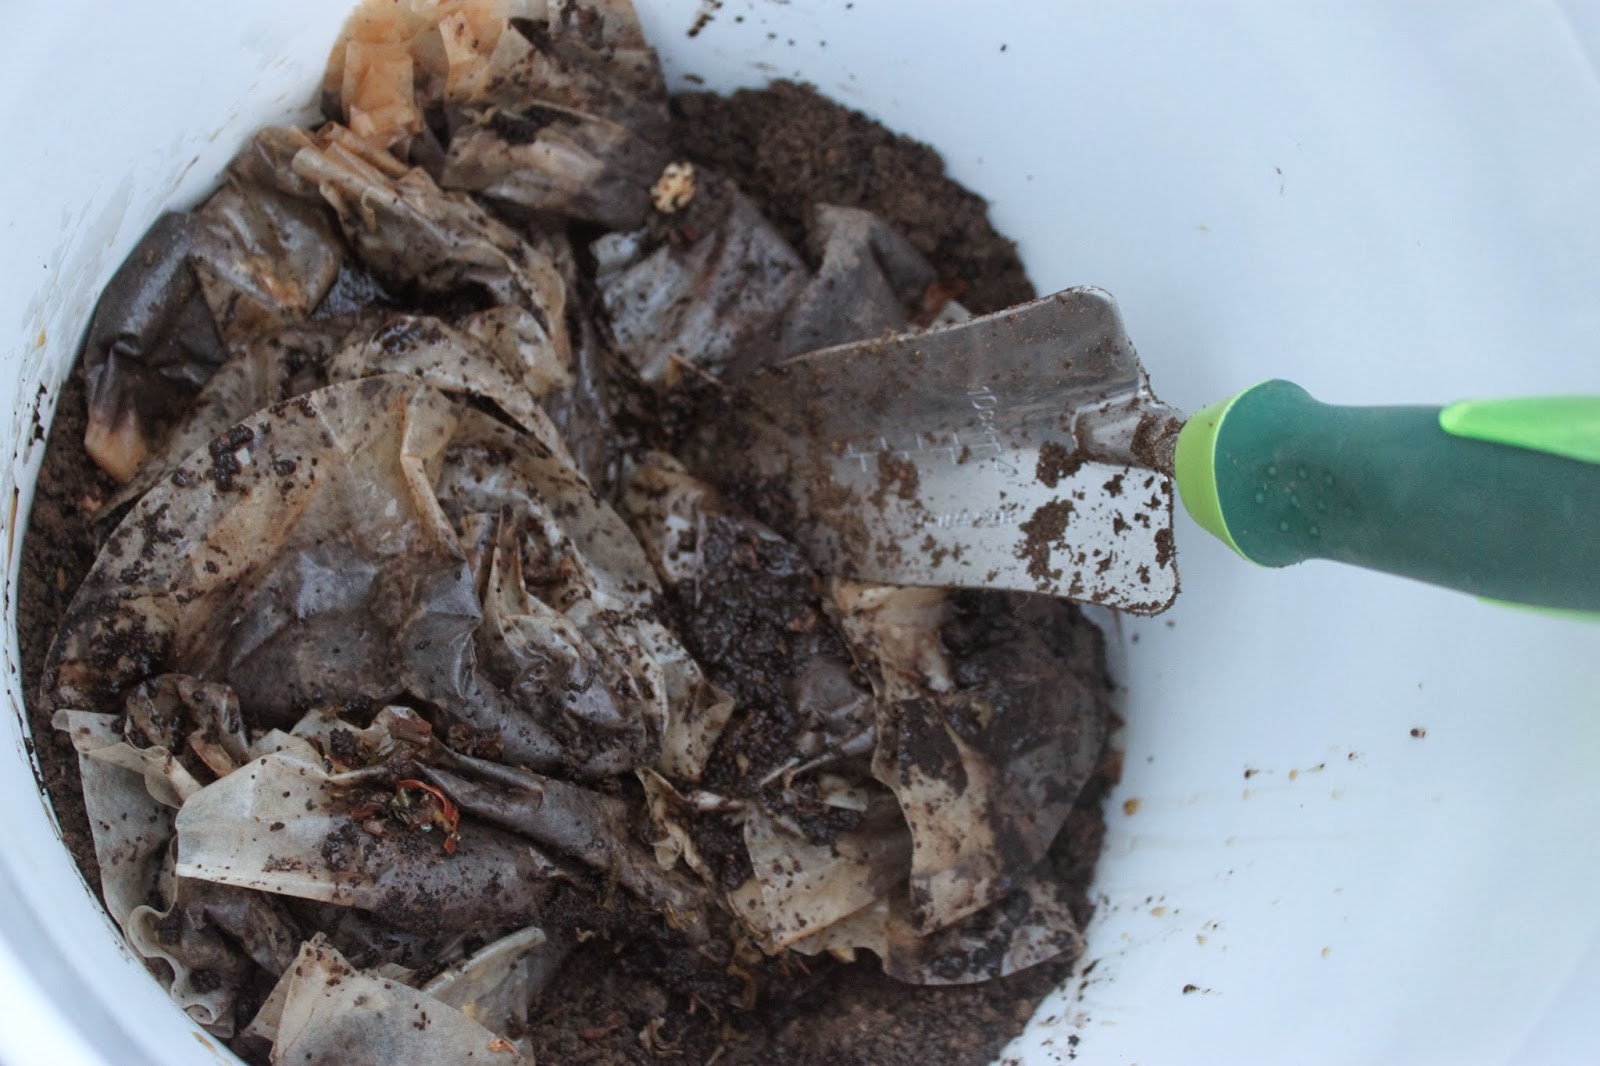
To start the process I took a few shovels of dirt directly from the garden I am going to plant crops in this year, until it fills the bucket 1/3 of the way. Set your bucket outside, I stick mine right next to the back door for easy access. Then add your coffee grounds to it! For us, that means 10-12 filters from our drip machine and maybe some espresso grounds thrown in, but it fills our cute kitchen compost container in a week's time.


Add your week's worth to the bucket, then add more dirt so that it covers the grounds at least an inch! Now MIX! Repeat this process until you have a bucket that's 3/4 full or you're out of time. You can't add compost to soil directly before the planting season, as I said before, it is harmful to plants in concentrate!


Technically, the best time to add compost, in a one-season, cooler-climate, growing area, is in the fall when it has time to decompose over the winter. But don't worry, you're not out in the cold just yet! If you save your grounds over the next 4 weeks, or jumpstart with a bag of grounds from your local coffee shop, you can incorporate your bucket to your garden the FIRST WEEK OF FEBRUARY! Or alternatively, in each separate bed one month before you intend to plant crops. Now, since ours did not fully decompose before it will be time to plant, you MUST mix the composted grounds in the soil, but hey, you were going to till it all up anyway!


Ideally we want an inch of compost on our bed EVERY YEAR, but if you're like me, you missed the memo, and this is our little shortcut! I would recommend adding 3 inches at the end of your growing season this year to make up for our cheater gardening. This will combat erosion too! I will hold myself accountable to it, as dirt is easy to make, not worth the price you pay in-store, and is a problem to mass produce for our poor farming practices. Really we should all be using precision seeders, a conservative farming method that does not involve tilling and exposing loose soil to the elements, thereby eroding the soil. However, I am not an expert in this method, I just know why it's better, but I also know that we can create soil faster than we can erode it! You can foodcycle and let Waste Management compost for you, or compost at home like we are doing on a small scale with our coffee dirt! 


For more passion on dirt, watch this lecture! It's an informational hour, but I don't mind if you're not as interested as I am!!


Foodcycling, composting, and making coffee dirt are great ways to reduce your garbage output! Want a fancy kitchen container? Commit to reducing your garbage output by ONE WHOLE STEP! We made it through Christmas using all of the techniques I shared before the holidays, and that means only 1 can for a whole month! The only thing that might get in your way is take-out, it will wreak havoc on your good garbaging...or buying new things, like furniture or pictures, anything that comes in Styrofoam packaging, which can be stored up and carted to your nearest Styrofoam recycling plant, or it can be used as buffering in packages you intend to mail, otherwise, if you foresee a boatload of peanuts and blocks, also be ready for a cute little $4 excess trash charge. Buy used if you can!

Monday, November 25, 2013

Teaching Your Toddler the Alphabet! I SPY Giveaway!

Two words: Bob Books. They sell them at Costco periodically, and they are awesomeness!!! We have the complete collection, and paid $10 a box. You can also find them, used (which really doesn't make a difference, there are no activity pages) in the children's section at Half Price Books! I've seen them there for as low as $6!


Regardless, every day after lunch, the girls and I open up a Bob Book, and get going. Bob books are organized in sets of two or three letters per book, so we go through one book a week, and when we get to the end of the alphabet we repeat!

I sit with a girl on either side of me, point to the words and have them repeat as I read them! They are only 2 and 3 after all. When I come to a letter standing alone, I do not read it, but allow them to guess what it is, and going through the series the second time, Kaylee Autumn can name them all! She can even recognize the word, “the!” I also ask what sound the letters make, and even point out some letters within the words of the sentences on the story pages, asking them to name the letter. We have been “learning to read” since age two with Kaylee, and at first she didn't know what I was asking when I pointed to the “k” in “kite” and asked what it was. However, when you take the time to say, “there are 4 little letters in this big word, k-i-t-e, the word is 'kite,' but these little ones are letters,” eventually you can shorten it to “what's this little letter?” and she GETS IT! Then you can point out little letters everywhere, and it will make the difference between “i” and “l” much easier!


After we “read” the book, I set it face up on my lap so we can see the capital letters on the front cover. Then we take out these SUPER AWESOME dry-erase sentence boards, and our kid-size dry-erase markers. BOTH were purchased at Target in their dollar section for, you guessed it, a buck a set! 4 sentence boards and 3 markers per pack. I give each child a board, then I take the Red pen and draw the capital letter of the day on the first line, while saying a little phrase on how to remember how to draw it, and trace over it while saying my letter-drawing mantra two more times! Then I draw it again on the row below, trace over it two more times, all while repeating the letter mantra! Since there are two letters per week, we practice the first letter for two days, the second letter for two days, and on Friday we try both! After I am done writing and repeating, I take out a blue or green pen for one child, place it in their hand, helping them with the three-finger pincer grasp, and we draw the letter together directly after my Red letter, three times, move down to the next line and repeat, while matra-ing away! I repeat all of this with the next child and their individual board while I let the first one try to draw the letter on their own. They can still hear me saying how to draw it while I teach the sibling, and sometimes, they can do it!


This week was “M.” And “'M' has a straight back, with one hump, twooo humps!” After practicing together, my little smartipants three-year old, Kaylee could write it on the first try!!! Remember to tell them you are proud of them!! Because when you do, they will practice writing that letter on everything!

Kaylee Likes To Trace Before Trying The Letter On Her Own!

Teach your child to read and write for $12?! UM, YEAH! You can further their reading education in coming years, at $10-20 a year for the subsequent steps in the Bob Book curriculum, depending on how fast your child learns. My girl is fast, she could recognize the whole alphabet by 26 months, and can now write A, H, I, L, M and O!!! I'm sure there are faster children, but it's healthy to brag about your own ^_^


So! If you can tell me how many “M”s are in this picture, I will give the winner...
The First Set Of Bob Books! A White Board Set! And a Pack Of Dry-Erase Pens!!!

I spy with my little eye...


Monday, November 11, 2013

Diapers and Potty Training Part 2:

My gracious friend, Evelyn, is here today to teach us how Elimination Communication works for her! Since I never tried it with my young ones, and actually had never heard of it until they were potty trained, I thought Evelyn would be a lovely resource for those of you who have not heard about it, or are reluctant to try it! The first video discusses the benefits Evelyn has found with doing EC with her beautiful babe, Daphne, and the second is a short demonstration to sum up how to do EC with YOUR baby!


While Evelyn's story is truly inspiring, and a welcome parenting tip on this blog, it is not everyone's story. Let me tell you a bit about our experience with the potty!

The average toddler potty trains somewhere around age 2-2 1/2. Developmental psychologists support the Montessori theory that there are two ages of sensitivity (if you do not start training from infancy), one at 18 months of age, and the second not occurring until age 3. Now it is possible to train outside of those windows, however, they are golden windows of opportunity!!!

We chose to train our second daughter at 18 months, and I am so glad we did! There was no pressure to have her trained in a certain amount of time, because we were “beating the average” and not “falling behind.” No assumed pressure on mom means no pressure on the child, which is a more favorable environment to learn in anyway!

Training your child “early” obviously cuts down on your diaper use, whether it's 6 months of disposables at 155 dollars, or 39 loads of diaper laundry! It also tends to be easier for the child to master, thus building confidence and capability in those early years!

Step 1: Buy at least 10 pairs of cotton training panties! You will probably have quite a few soaked pairs before your child masters the concept. I purchased all of our daughters panties at consignment stores, for $1- $1.50 each! We even got some fun ones that have neon stars, and brand names like Hanna Anderssen.

Step 2: Also purchase at least 10 pairs of cotton pants with elastic waists. They will be easy for the child to pull down to use the potty themselves! We also got our stash for about a dollar a pair from consignment. You will have to wait at least a couple months to switch to denim.

Step 3: Get a child-size potty! It's not absolutely necessary, but neither are panties, and you wouldn't forgo those... We chose a simple plastic potty, with a cushy insert so her tiny bum was comfy, that was easy to dump, clean, and closed to convert into a stepstool to reach the sink. We purchased it, again from an awesome consignment store, for $7! Color doesn't matter, but comfort, convenience and price do!


Step 4: Take a one-week hiatus from obligations. While some children train in a day, others take a few, and one week is a good, no-pressure amount of time to teach and learn.

Step 5: Time to start. Show your child their new potty, and tell them “this is where we go potty. This is where the pee and poop goes. We don't pee or poop in our new panties.” Let your child watch you go on your own toilet, and help them go on theirs the first few times. Keep them in their training panties only for the first 3 days, then introduce pants again. If you catch your child peeing in their pants, just walk them over to their toilet and reiterate that “this is where we go potty.” Also, make sure they take care of their own mess; have them put their own soiled clothes in the dirty laundry, and give them rags to clean up their own mess on the floor. This effectively gives them ownership of their actions in that they partake in the consequences, which means there is no need for punishment, because the natural consequence of having to stop playing in order to clean up is punishment enough.

That is it. Pure and simple.

Our first daughter took almost a month to effectively train, and I know, in Montessori it's “potty learning” not training, because they are not dogs, but to appeal to the language of the parent who isn't necessarily privy to Montessori speak, I use “train.” But again, we train in love, which means we do not yell, we do not force, we allow the child to learn at their own pace. And we take Montessori concepts and expand if we feel it's necessary, as with toilet training, we introduced small candies as rewards for potty success, for the potty user and her sister, because that turned her into a superb cheerleader! 

It is the same with nighttime training in our house. Both girls get treats for keeping the bed dry, which River was more successful with than Kaylee, even though Kaylee is her senior. It proves that children learn at their own pace, but they all do get it eventually! It could also suggest that we humans are creatures of habit, and so by not teaching Kaylee potty training soon enough, I may have stunted some nighttime dry success! Man, if I had heard about Elimination Communication then! Instead, we used plastic pants over panties for the first week or two, so that she would feel the wetness and be encouraged not to wet the bed, whereas with EC your child is more aware of their need to stay dry and you can avoid the whole plastic pants ordeal!

If you do end up using treats for success, I suggest you phase out the treats for one aspect (after it has been successful for awhile, as in a week straight) before rewarding for the next. Try without first, before introducing candy rewards. For example, we phased out candy rewards for successful toilet use before rewarding keeping the bed dry, that way there isn't a ton of unneccessary sugar in their system all the time. That proves to be more difficult to manage than it is good! The way to quickly phase out is to simply say, “we don't need candy for that anymore, because you are a big girl!”

That is what has worked in our house! And I calculated the savings once, with all of the newborn diapers, and wipes, for both girls, which tabulated $1721 after I took out our cost for cloth diapers, liners, and spray!!!


If you would like to see what the fuss is about, or you know someone who might be interested in the cloth system, comment or message me to be entered into the drawing for 2 cloth diapers (BumGenius, gender neutral), bamboo liners, 4 wipes, spray bottle, shampoo and baby oil STARTER KIT! Plus 8 2T plastic pants and 1 18-24month plastic pants for nighttime and naptime training! I also urge you to try to stick your child over a toilet a few times, to try out that EC concept! We in America are "blessed" with our diapers, cloth or not, that aid our day to day function, but most other countries do not have diapers at all, and guess what? They are not dependent on them! Then if EC works for you too, you will have a couple of eco-friendly diapers for just-in-case moments, or interim EC training!
The colors below are the most likely colors you will receive! (I still am working on some deal magic, but they will be new or excellent condition, that's a promise!) And to check out that Bjorn potty Evelyn mentioned...

Friday, November 8, 2013

Cloth Diapering

One method to reducing your trash output, and rescuing your wallet from sure despair, is to use cloth diapers! Or, if you are just par excellance in the potty training area, you don't need diapers at all! I have a wonderful friend who uses Elimination Communication with her first born babe, and boy is she wonderful!!! I am barely familiar with the method, so I will not pretend to teach it to you, that one is something you will have to look into on your own!

The cheapest I found diapers for in the disposable department was 17 cents apiece. Sure, you can get them a little cheaper when your tiny one is in size newborn, or 1, but they also use more diapers at that stage, so for our calculating purposes, we will say that the cost versus quantity balances out. The brand I found to be cheapest, without leaking all of the time, or breaking, etc, is the Target Up&Up brand, and if you buy in bulk, and buy two when they offer $5 back, or buy online with your RedCard, save 5% and have it shipped for free so you save gas $$, you can whittle that price down.

Your child will need 5 diapers a day, if not more. 5 x 365 days a year is 1825 diapers. X2 years of use, on average, is 3650 diapers!!! That is a TON of TRASH!!!!! In America, we use 18 billion diapers a year, and “18billion diapers add up to 82,000 tons of plastic a year and 1.3million tons of wood pulp -- 250,000 trees.” now multiply that by .17 per diaper and you have a whopping 620 dollars! And I didn't include tax, or needing more diapers in the beginning 6 months, so that is the most conservative of estimates!!! Don't forget wipes! (If you click on the link, the author addresses the energy analysis of cloth diapering, because you have to remember that the cloth uses water, and lots of cotton, but it's put in perspective.) 


Now, I particularly like BumGenius cloth diapers, because they are easy! They come with velcro or snaps for closure, and they are adjustable so that they fit a newborn (not preemie mind you!) and grow with your child! They are easy to wash, just take out the inserts, and wash on their own cycle. They come in an assortment of colors, and will last the two year average necessary, but if you happen to need them to last longer or the velcro and elastic wear out early, you can by pre-cut replacement kits for a buck apiece!


Brand new, these diapers go for a whopping $17 a pop! However, I have never spent more than $10 by buying used through eBay! You will need about 20 to be covered ;) unless you prefer to wash more, or less frequently...that was just the magic number I found that worked for our family. Then, when you are all done with your diapers you can resell them! I bought my lot for 200, that is twenty diapers for ten bucks each, then sold my whole lot for 100. That's right, for 2 years I only spent 100 on diapers!! Boo YA!


For the poopy part of the situation, you have a couple of options. You can buy a spray nozzle that attaches to your toilet, and spray out the insides. Or you can buy some disposable liners, made out of bamboo or silk, that are biodegradable, which you lay right on top of your diaper inserts, touching baby's cutie-patootie, that you can lift out and flush! Imse-Vimse is a great brand for that, or look up “diaper liner” on eBay and you can acquire rolls of 100 for 6 bucks a pop.


Another piece of diapering is wipes. Those little wet rags of goodness can really take a bite out of your budget! Instead, I propose cloth wipes! And trust me, once you switch, you will never go back to disposable! For the wipes themselves, we used old towels and cotton receiving blankets, which we cut down to the size we wanted ( about the size of a disposable wipe) and stacked them, back side out, then sewed around three sides, turned them inside out like a pillow case, then sewed up the last side! This way you have a rough side for sticky messes, and a soft side for the rest.


Then, for the cleaning solution, I use my mom's recipe: 1 part Baby Shampoo, 1 part Baby Oil, and 1 part Water, plus a little essential oil for some fresh scents!


Again, you could also try the EC method and forgo the whole diaper scenario, also scoring major mom points while you're at it! Saving the whole lot of $$ and your sanity when it comes to toilet training, because you are way ahead of the rest of us.
Stay tuned next week for a diaper giveaway!!!

Wednesday, November 6, 2013

A Garbage Challenge!

Our Entry Into the Foodcycling Pledge

A wonderful reader of mine suggested I blog about this topic, and after the Food-Cycling campaign Waste Management facilitated with WSU, I felt I needed to point a glaring eye towards our waste output. Before the campaign, we owned a cute kitchen compost jar, and by cute I mean ceramic and petite, but adorable! I would get annoyed at how little I could stuff in there and how frequently I had to dump it, so when WM offered a free Food-Cycling Container, I jumped at the opportunity! They just handed out over 2000 units to families that signed a pledge to food-cycle instead of dumping all their food waste in the trash! Now I have a larger kitchen container, and I keep my cute one for storing food for my chickens (I keep both on my back deck in warmer, buggy months)!


Now, it is estimated that one eighth of all trash is food waste, so composting and foodcycling are an awesome start to a solution to the trash problem! But let's back track a bit shall we? How about buying in bulk so that you are not throwing away multiple containers? This also happens to be the cheapest way to acquire food! If you buy coffee, why not bring your own mug? How about keeping a recycle bin in the house for any containers and cardboard you do collect? I know, that sounds fundamental for some, but now how about posting the list of acceptable recycle items posted near your receptacle? I had no idea how much MORE I could recycle until I posted that little reminder on the inside of the cabinet door where I keep my recyclables container! Did you know with WM you can recycle empty aerosoles and small kitchen appliances?! That broken toaster, or that empty bottle of hairspray, yep, that too!


Some other ideas...

In our house, we have stopped purchasing paper towels. I used to buy the 100% recycled paper, eco-friendly, small sheet size kind in bulk from Business Costco. I thought I was pretty great! That is, until I noticed that all of that paper product was still going back in the trash. I couldn't recycle or compost it due to the chemicals I was putting on them...but what was a girl to do for kid-licked windows? I know, first response is, don't put chemicals on them! However, that is a post for another day! Instead, now I use cloth cleaning towels, which I launder and reuse! I use a microfiber cloth to run over the surface of the glass after I have cleaned up the majority of the mess in order to get that streak-free shine! It has to be microfiber though, or pure cotton, however the microfiber is easier, and I only have one of them since I only clean windows once a week, if that! You can also use old newspaper so that at least you are not using new paper towels to clean with, which will save you money until you can get some cloth, but those newspapers now have to go in the trash because they are soaked with chemicals. Another place we used to use paper towels for was napkins, even though I had a nice stack of cloth ones, but after seeing just how much trash we generate, which is thoroughly unnecessary, I have kicked my lazy bum and picked up those cute napkins again! So you will see our paper towels on our window sill, but you will see that the roll stays full, don't be fooled...they're an unwelcome guest and a reminder to keep on with the cloth!

From Left To Right: Nice Kitchen Towel for Decoration and Picking Hot Things Out of the Oven, Dish Rag for Cleaning Counters Daily, MicroFiber Window Cleaning Cloth, Regular Cleaning Towel for Bathrooms and Such!

For other cleaning, again I use cloth rags. I have used everything from old worn out towels, to receiving blankets. Just cut them to size and put a stack in easy reach! If you don't have access to reusable material, you can buy a yard of 100% cotton at $10-$12 a yard, and by golly you better have your 40% off (at least) coupon at handy to score your bargain! Cut that down into 1'x1' squares and tada! You now have 9 cleaning rags (more than you will ever need) for $6-$7 which is less than a buck a piece!!! You can also make your own napkins this way too, which means you get to pick out what pattern you want! Do I hear holiday napkin themes?!?!

My lovely subscriber, Cass, suggested all of this to me, as well as scouting the thrift store for flat sheets to cut up for the same purpose! Now THAT is penny-pinching at its FINEST!!! And man do I ADORE her enthusiasm!!!

Here is a peak at how she handles her trash:
“We have four containers in our kitchen. 3 small bathroom sized garbage cans and 1 compost container on the counter. One of the containers is for burnables-for fire pit or fireplace so it's easier to start fires. (We also burn material scraps from crafting, and clothing that is not reusable or donate-able...) The second is for recycle, but we save a lot of "good jars" for nuts/ bolts/ beads/ homemade cleaners and beauty supplies... The third is for garbage, which we double line with plastic grocery bags—so no buying garbage liners! We use the plastic grocery bags in the bathrooms as well. And the compost is self explanatory... But for a family of four we use only a 20 gallon garbage can (size matters; smaller is cheaper)... Plus, we do not rent the garbage can, we purchased it, which saves over the long run. Well, that's enough "trash" talk...but our garbage bill is probably as low as it can get!”

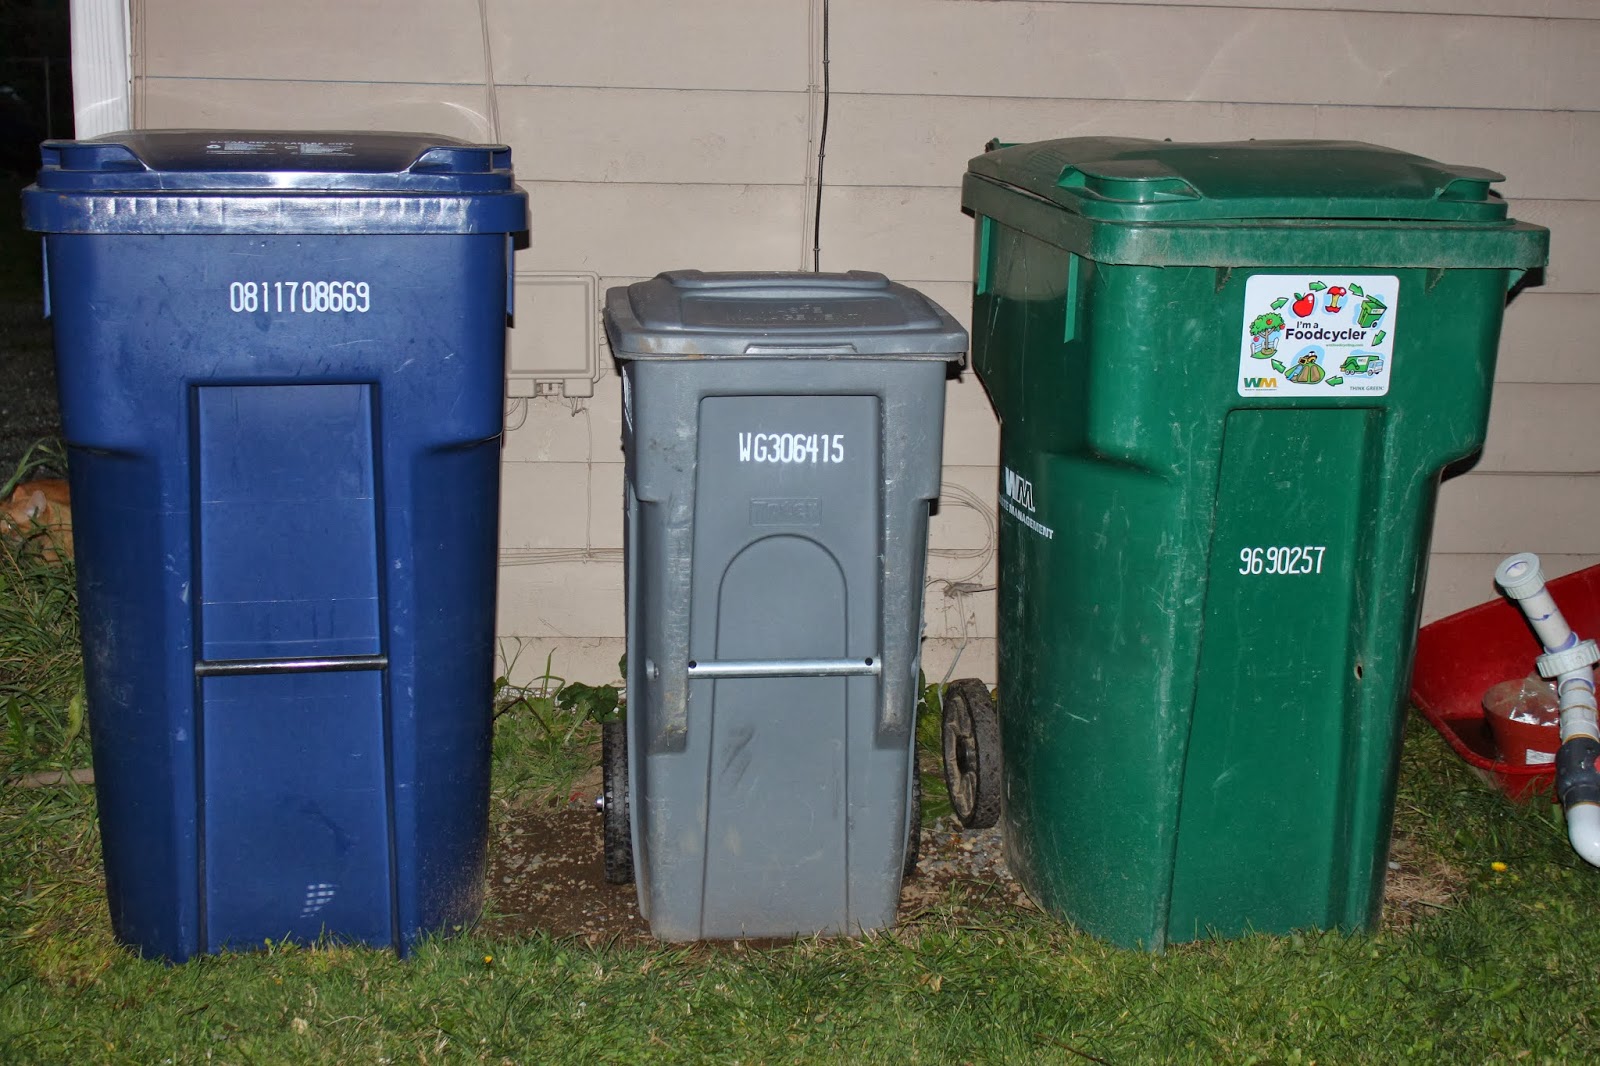
Our family of four currently uses a 32 gallon trash can, that we rent, which gets picked up weekly. My goal is to lower that to the 20 gallon weekly option, and eventually down to the 32 gallon once-a-month option! I also want to purchase a can, so I don't have to rent one anymore! The savings by just moving one step down and owning my own can would be $7.10 a month...that's a Netflix subscription! I know another blogger, you should check her out at Playing House Full Time, who does the once-a-month trash option for her family of four! It IS possible folks!


I contacted Waste Management, our garbage company, the brilliant people who got us our Foodcycler container, and this is the quote they gave me for my area!
Description
Price
Weight Limits
1-96 gallon, weekly, 9-12 people, about 7 white kitchen bags
$40.55
200lbs
1-64 gallon, weekly, 5-8 people, about 5 white kitchen bags
$32.20
200lbs
1-45 gallon - not offered
-
-
1-35 gallon, weekly, 3-4 people, about 3 white kitchen bags
$23.45
100lbs
1-20 gallon, weekly, 1-2 people, about 1 1/2 white kitchen bags
$18.10
85lbs
1-35 gallon, 1x month, 1-2 people, about 3 white kitchen bags
$15.45
100lbs
Customer Provided Cans
1-32 gallon, weekly, 3-4 people, about 3 white kitchen bags
$22.40
65lbs
1-20 gallon, weekly, 1-2 people, about 1 1/2 white kitchen bags
$16.35
65lbs
1-32 gallon, 1x month, 1-2 people, about 3 white kitchen bags
$14.20
65lbs


I also asked about Yard Waste, but service is a standard $9.55 a month, which is all the more reason to start your own compost pile, which will do miracles for your yard and garden, however, they do offer credit for recycling! We currently put our Foodcycling scraps in the Yard Waste container, which you can do too! You can take any opaque bin with a tight lid to place on your counter to collect debris. These are my favorites:


So with all of these WONDERFUL tips and tricks to get started, here is my challenge: By the start of December, I want to see your Garbage Output lowered by one whole step! My family is going to complete our goal of moving from a 35gal weekly to a 20gal weekly—ONE. WHOLE. STEP.

If you can commit to the challenge, and prove your success, I will award one random winner a cute Kitchen Compost Container! The choices above are for you to choose from!!! (Unless the winner has something comparable in mind)

For anyone who thinks they just can't reduce their impact any more, submit what your trash output is and your family size, and one randomly drawn winner will receive an AWESOME Vegan Cookbook to keep you cooking with bulk ingredients for health and eco-friendliness!


Stay tuned for more tips...YOU UP FOR THE CHALLENGE?!