Showing posts with label Eco-Friendly. Show all posts

Wednesday, February 19, 2014

Chicken Feeder

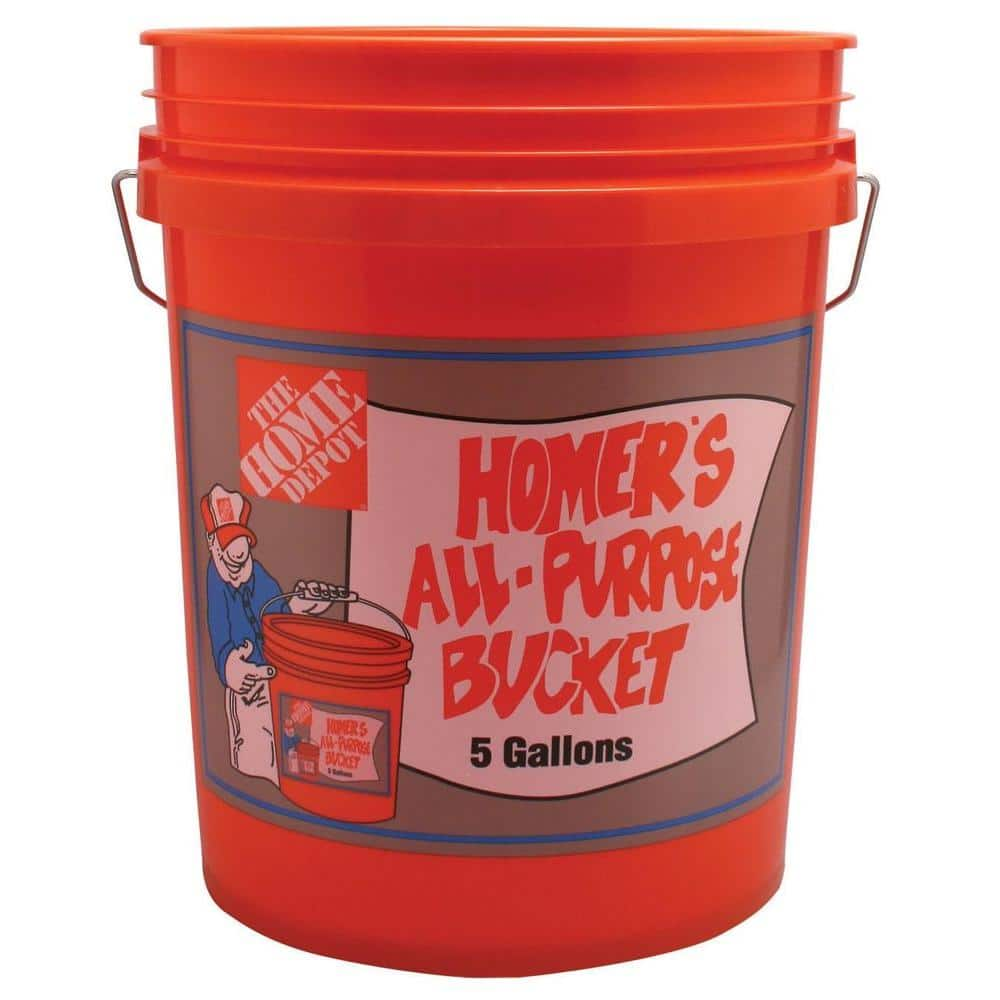
Remember that Ace Hardware bucket I used for making coffee dirt?! Well I told you that I usually use Home Depot buckets, despite the aesthetic disadvantage because of their price...and here's proof!

For 13 chickens, you need a viable dispensary that all those beaks can peck at once! This is our cheep, cheep, CHEAP solution! ^_^


To make the feeder, all you need is a 5 gallon bucket and lid, a plastic dish/tray, a hole saw and drill, and a handful of screws. The whole idea was Brandan's, and it was quite the ingenious invention!


Available at Home Depot, or any local hardware store, is the 5 gallon bucket; in the neighborhood of $2.78, the lid is an extra dollar. Also at the hardware store is the screws, for less than $3, and all you need is 5--we chose black wood screws for strength and rust resistance. Keep looking here for a hole saw, depending on your drill and brand preference, the bit should be around $10. This is the one we got, on Amazon:


Now drill trilateral holes at the bottom of the bucket, so that when feed and grain is poured into the top, it will spill out the holes.


The plastic feeding dish was purchased at a feed store for a little over $15, and I'm sure you could hunt around to find something that works for a more economic price, but the rescue chickens all came on fast, so we needed something now! Attach the dish to the bottom of the feeder bucket, so as to create a trough of grains!


And you're finished! Just mix up your grains, pour, and lid the entire bucket. While the lid is water-tight, the trough is not, so you will still need to stick it in a semi-dry area.


We purchased multiple buckets and order all of our grains from Azure Standard. I use The Elliott Homestead's Chicken Feed Recipe, since it is Organic, Non-GMO, and Soy Free! It is cheaper than buying organic (or even non-organic!) bagged feed from the feed store, and cheaper than premixed organic feed from Azure. It is smart to constantly check for what they term "chicken wheat" because it is almost half the cost of the regular wheat berries, just because it is the remnants from cleaning the mill and not fit for human consumption! 


I also recommend buying the 50# bag of kelp granules, because they won't go bad and are SIGNIFICANTLY cheaper per pound. I adapted the Elliot Homestead recipe to suit my hens, as they are free range for the majority of the year and do not care for oats (I believe this is because they get their protein from other buggy sources) and will pick them out instead of eating them! 

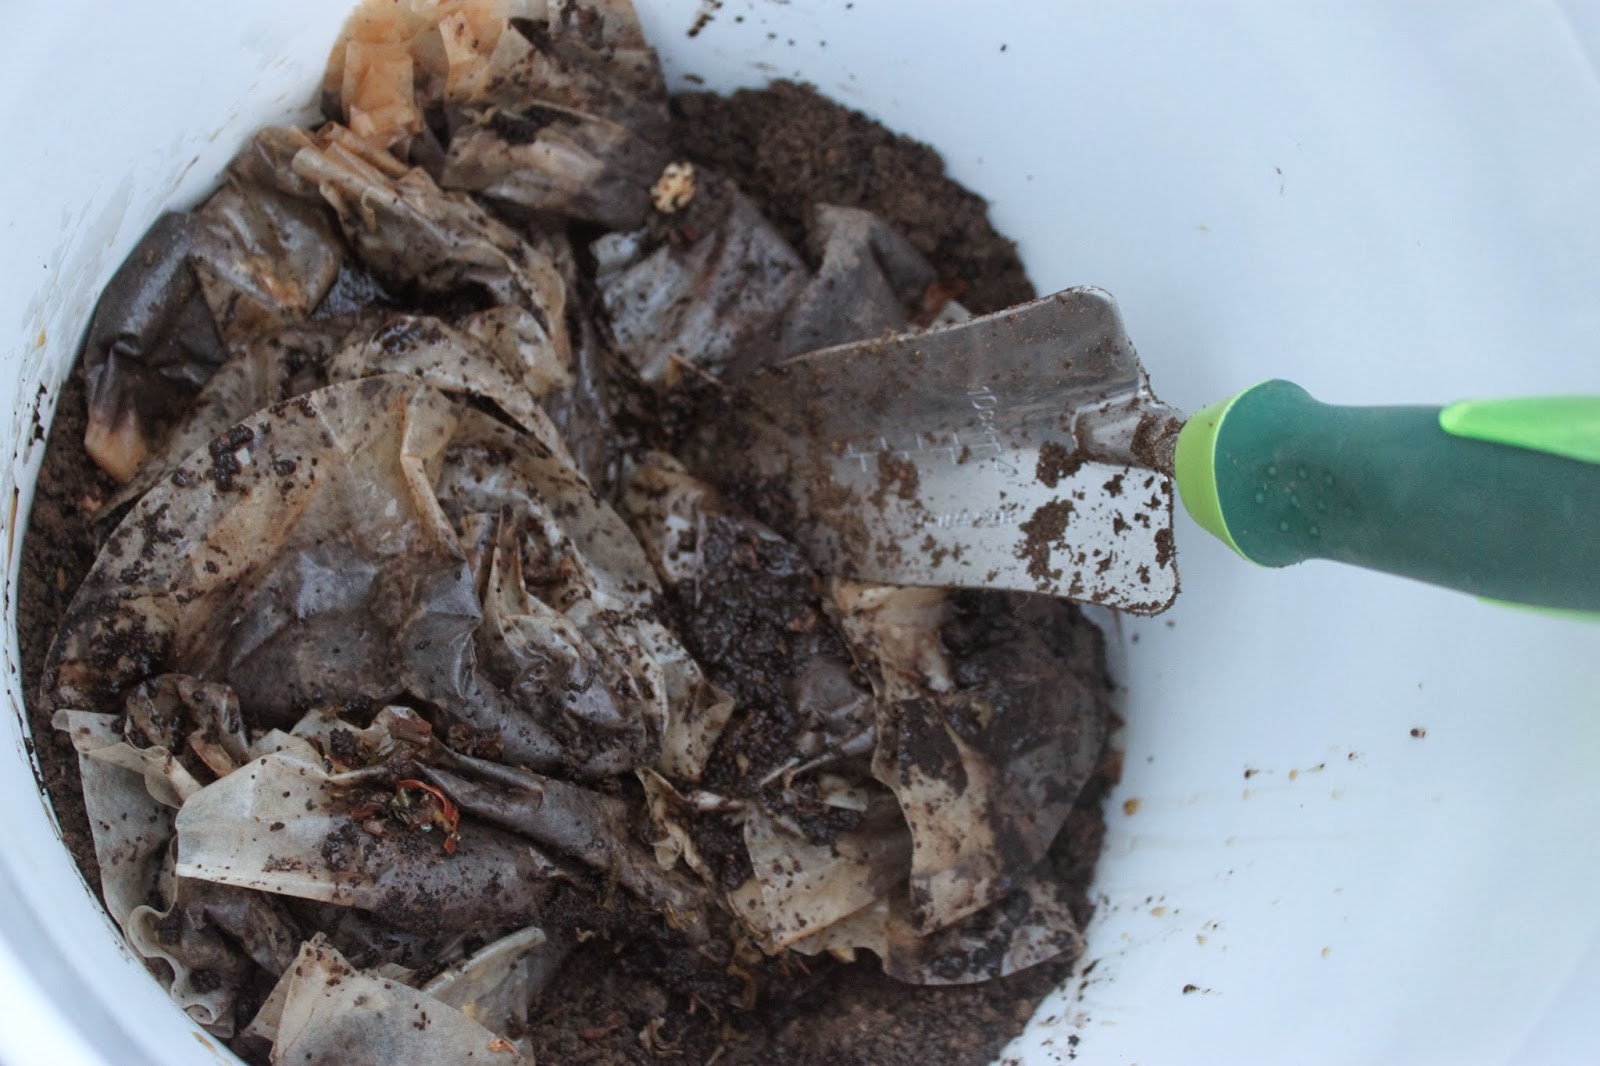
Not this little guy! He only lasts one and a half feedings!

I used to fill each bucket up with a different grain, but now to save time, when I get the order home, I mix up all of the feed (sans the oil and kelp called for in the feed recipe) into each bucket. One bucket lasts me one month, so I can mix up 6 months worth, store it under our deck with the watertight lids, and keep the small excess of kelp and various seed remnants in their bags, stashed away. This way it takes up far less time, and does not take up a ton of room to store 6-8 buckets. It all depends on where your storage is.


It is awesome to have little helping hands do your work for you too! You can be working on one bucket, while they do another!  


Mixing all of the food into individual buckets also helped me sort out the price. One order of feed stuffs (minus the excess kelp) was $210. I mixed up 7 months of feed, making it $30 a month to feed my hens. Throw in one bale of ultra-compact straw for $10, and that makes $40 a month, or $10 a week. I get about 4 dozen eggs per week, which means I need to sell them for about $2 a dozen to break even. Sometimes I get 6 dozen, which turns a profit, or pays for a little heat lamp when the average temperature is 18 degrees (wait, Seattle, say what?!), or upsizing the coop! 


We do not "Date Stamp" our eggs anymore, because they are purchased up so quickly, and one buyer pointed out that not only do eggs last a significantly long time (longer if left unwashed), as in 6 weeks, but also our stamp ink is probably not organic! You could buy organic ink...we have some for other purposes...but if your turnover is high, the stamping is insignificant!

Friday, January 31, 2014

The Nearly Free Chicken Coop!

Chicken season is coming, and about this time two years ago we were scouting free wood piles and picking up all sorts of pallets that local businesses tossed to the curb. Sure, they can use wood recycling, but a lot of places just keep bins of wood, which is not only amazing for your wood fire, but it can be upcycled into projects like this!


We only had 4 hens at that point in our venture, so an enclosed space was nice, and the previous residents in our home left this nice sized dog kennel, which provided elevation for our birds and the enclosure we desired. However, you do not have to elevate yours as we did, I would recommend 8 inches so that it is off the ground during rainy weather, but space enough to make it drafty and unappealing to vermin and giving your cleaning shovel space to scoop out the junk, all while providing the ground underneath it a breather, because you will want to move it! Penned chickens ruin the ground, which is why we let ours free-range most of the time!


So your first task is to collect as much wood as you can, you can return what you don't need, or burn the excess! Most of our wood was nailed together, so we worked hard to pull out all of the nails, sometimes sawing them off if they were stubborn, in order to free the planks on the pallet! Now take the sturdy frame of the once-pallet and use those 2x4s to make your own frame! Box shaped bottom, bracer in the middle, then upright posts at every corner and middle, but make sure one side is taller than the other by 6 inches to allow for a slanted roof to properly shed rain. Frame out the top as you did the bottom. Then take all of the blanks you removed from the pallets and use them to make a floor (unless you found sheets of plywood in someone's free bin, that would be lighter and better!) and walls, and roof. Use a nailgun to make this process faster! There will be some holes in between the boards, but try to get them as tight as possible, my chickens did not mind through the winter, and honestly I think a little fresh air kept them happier. I always made sure that they were toasty and cozy through the coldest days! For the back of the coop, we used a sheet of plywood that opened on a hinge, and hooked closed at both ends at hook and eye loops. Then you can clean it out and collect eggs easily. Don't forget a door, which is also easily made of plywood, hinge, and hook and eye closure!


These are the model plans we used to base out pallet coop off of! Since Brandan works at a sheet metal company, he was able to snag a piece of corrugated sheet metal for the roof, but you could use corrugated plastic for a cheaper option, or scout any metal manufacturer's recycle bin! For more plan details, click here, otherwise we used just the basic dimensions and replicated what we could.


A simple addition is feeder houses, which are useful for keeping food and oyster shells dry. They are simply made, and even the kiddos can help decorate!


This coop was free aside from the hinges and hook and eye closures. You might accrue a little more, but scout craigslist for awesome chicken run fencing, or any scrap wood if you don't have any free wood recycling bins nearby!

Happy henning!!!

Monday, January 13, 2014

Wondering About That Garbage Challenge? Let's Make Dirt!!!

A couple months ago I presented a garbage challenge, and we approached the issue with just the right amount of recycling, composting/foodcycling, yard waste, and paper burning (yes, that's where all that foil-lined paper went...and a lopsided wicker reindeer!) with utmost fervor to achieve a whopping reduction of a 32gallon can once a WEEK down to a 32gallon can ONCE A MONTH!!!

I never thought it was possible, what with two "litter-bug" cats, two babies, and a multitude of Christmas packages! But we did, and it's marvelous! We use our own can that we purchased from Home Depot for $10, and voila, let the savings roll in!

Thank you to those who posted suggestions and encouragement, you were entered into the book drawing, since many of you are unable to reduce your trash impact, I thought I'd encourage right back with a healthy Vegan Cookbook! Now the lucky winner will receive a little kitchen helper, because veggies keep waste output low!


AND THE WONDERFUL, ENCOURAGING WINNER IS...


JOANN HILLHOUSE!!

And no, I promise I didn't rig it, grandma!

But my green-thumb grandma taught me a wonderful trick that helps keep your garden growing strong, and utilizes that lovely compost you are making. I know you've all seen those "grounds for your garden" bags of coffee grounds at Starbucks, or you at least know you can put coffee grounds out in your soil, but how, exactly? 

So we now save our coffee grounds in our cute ceramic compost container, it sits on the counter next to the coffee pot so that we ACTUALLY DO IT! And, I had a little help from Brandan's grandparents, who gave me a whopping 10 # bag of grounds from Starbucks for Christmas!!! Now, you definitely have time to save your grounds from here till Spring to incorporate them, but I'd like to take the opportunity to show you how it's going to look in the end!

First off, you can put coffee grounds directly on hearty rose-family plants: roses, raspberries, cherry trees, and the sort. Otherwise, be cautious, the nitrogen, which is a lovely energy source for worms, will burn your other plants!


And for your listening pleasure, while we're talking dirty, "Worms Eat Dirt" by the Aquabats!! Fun for kids (of all ages)!!!

So I start with a 5 gallon bucket. They are available at any home improvement store-- Home Depot, Ace, Lowes...although Home Depot is cheapest at 2.78 a bucket, Ace's is completely white, so aesthetically more pleasing to the eye! Although theirs is $4 more, so it depends on your budget, and how important it is to you! They're both equal in size, made from the same plastic, and equally water-tight when you purchase the corresponding lid...another buck or so...but for our purposes we don't need a lid on this one!


You will see that my demonstration bucket is white, but I assure you that it is because it was a gift! Although, again prettier, I did purchase my arsenal of buckets for chicken feed in construction orange!


To start the process I took a few shovels of dirt directly from the garden I am going to plant crops in this year, until it fills the bucket 1/3 of the way. Set your bucket outside, I stick mine right next to the back door for easy access. Then add your coffee grounds to it! For us, that means 10-12 filters from our drip machine and maybe some espresso grounds thrown in, but it fills our cute kitchen compost container in a week's time.


Add your week's worth to the bucket, then add more dirt so that it covers the grounds at least an inch! Now MIX! Repeat this process until you have a bucket that's 3/4 full or you're out of time. You can't add compost to soil directly before the planting season, as I said before, it is harmful to plants in concentrate!


Technically, the best time to add compost, in a one-season, cooler-climate, growing area, is in the fall when it has time to decompose over the winter. But don't worry, you're not out in the cold just yet! If you save your grounds over the next 4 weeks, or jumpstart with a bag of grounds from your local coffee shop, you can incorporate your bucket to your garden the FIRST WEEK OF FEBRUARY! Or alternatively, in each separate bed one month before you intend to plant crops. Now, since ours did not fully decompose before it will be time to plant, you MUST mix the composted grounds in the soil, but hey, you were going to till it all up anyway!


Ideally we want an inch of compost on our bed EVERY YEAR, but if you're like me, you missed the memo, and this is our little shortcut! I would recommend adding 3 inches at the end of your growing season this year to make up for our cheater gardening. This will combat erosion too! I will hold myself accountable to it, as dirt is easy to make, not worth the price you pay in-store, and is a problem to mass produce for our poor farming practices. Really we should all be using precision seeders, a conservative farming method that does not involve tilling and exposing loose soil to the elements, thereby eroding the soil. However, I am not an expert in this method, I just know why it's better, but I also know that we can create soil faster than we can erode it! You can foodcycle and let Waste Management compost for you, or compost at home like we are doing on a small scale with our coffee dirt! 


For more passion on dirt, watch this lecture! It's an informational hour, but I don't mind if you're not as interested as I am!!


Foodcycling, composting, and making coffee dirt are great ways to reduce your garbage output! Want a fancy kitchen container? Commit to reducing your garbage output by ONE WHOLE STEP! We made it through Christmas using all of the techniques I shared before the holidays, and that means only 1 can for a whole month! The only thing that might get in your way is take-out, it will wreak havoc on your good garbaging...or buying new things, like furniture or pictures, anything that comes in Styrofoam packaging, which can be stored up and carted to your nearest Styrofoam recycling plant, or it can be used as buffering in packages you intend to mail, otherwise, if you foresee a boatload of peanuts and blocks, also be ready for a cute little $4 excess trash charge. Buy used if you can!

Wednesday, November 20, 2013

The “Family Dinner” Style Birthday Party

THE WINNER OF THE DIAPER GIVEAWAY IS:
ANNIKA MANCHESTER!!!
Please Send Me Your Address So I Can Ship Your Winnings To You!


So after taking birthdays bake down to their origins, starting with Momma, we open up the
holiday to family, making a wonderful family dinner that everyone can come together and enjoy, celebrating wonderful life with us! Basking in all the love, cherishing each other, and sharing AWESOME food, if I do say so myself! The Family Dinner also provides the opportunity for grandparents who can attend to shower the little lady with love, and celebrate her, it's the perfect little space that honors family connections. Eventually, it's just not going to be feasible to invite grandparents and uncles to the “kid party” the girls share, even this year we are running out of space to invite all the extended family. That is where the Family Birthday Dinner takes the cake! We are able to round up as many uncles, aunts, cousins, and grandparents that we can and celebrate it all together! Then the kid party has its space, birthday day with momma has its space, and we have just one more excuse to have a grand time!!!

For Kaylee's Family Birthday Dinner, I hosted 14 guests alongside our 4-person family. And what to feed a 18-person brood? The Haertel Riesling Pasta! Mango Walnut Salad! Biscuits shaped like butterflies! And a gorgeous, melt-in-your mouth, Blueberry-Cashew Cream Cake!

The Haertel Riesling Pasta is entirely my own design. I first invented the recipe when I was not vegan, three years ago, and back then I called it Shrimp Pear Sake, this is because the original recipe called for sauteed shrimp and any Pear Sake I could get my hands on! Since we are vegan now, we do not eat shrimp (plus, River has an allergy to shellfish, who'd have thunk?!) and Pear Sake is hard to come by, plus it's usually not worth the price, so I reinvented the recipe using Riesling! My favorite is Kung Fu Girl! Many would say that it is an insult to consider a wine a cooking wine, because they have cooking wine for that purpose, however, as the name suggests, it is necessary to use a wine you like for this dish! The undertones of the wine you use become part of the exquisiteness of the pasta! Shrimp Pear Sake actually tastes like pears! Kung Fu Girl is the closest mimicry to this flavor, and she's only 9 bucks a bottle on average!

Shrimp Pear Sake

Cook Time: 30 minutes
Yield: 4-6 servings

Ingredients:
1 # Shrimp
1 # Noodles
¼ Cup Flour
2 Tablespoons Sugar
½ teaspoon Salt
½ cup Butter
1 1/3 cup Milk
2/3 cup Pear Sake
½ cup Lemon Juice
1 teaspoon Thyme
2 Tablespoons Chives

Haertel Riesling Pasta

Cook Time: 30 minutes
Yield: 4-6 servings

Ingredients:
1 # Seitan or other Vegan Sausage
1 # Noodles
¼ Cup Flour
2 Tablespoons Sugar
½ teaspoon Salt
½ cup Coconut Oil
1 1/3 cup Plain Soy Milk
2/3 cup Riesling
½ cup Lemon Juice (Lime is good too!)
1 teaspoon Thyme
2 Tablespoons Chives
(1 tsp Parsley and 2 Tbs Italian Seasoning is also a good mix in a pinch!)

Instructions:
Sautee your shrimp or sausage, you may add salt and pepper to taste at this stage. Bring a pot of water to a boil for your noodles. Melt your butter or oil in a medium saucepan. Mix up your flour, sugar and salt in a small bowl then add it to the melty goodness. Stir until all of the flour soaks up the liquid, then add the remaining ingredients! Whisk until smooth and creamy, then bring to a boil for 1 minute to cook off the alcohol, stirring constantly. Then reduce to a simmer. Cook up your pasta noodles, drain, and combine all three pots of goodness together!


Mango Walnut Salad: Baby Spinach, 1 Mango diced, 2 Avocados diced, 1 Red Onion minced, and some poppy seed dressing...YUM!


And the finishing touch is Blueberry Cheese Cake! From Vegan Zombie! The “cheese” is actually pureed cashew, and the crust is raw in his directions, but I like to bake my crust on 200 for 15 minutes. Either way is crunchy good!

To top it all off, all of the dinnerware was compostable, so there was zero waste!

Now on to party pictures!!!

Had To Steph!!!

Can You Believe HE Is Her Uncle?!

Momma With Babe...So Sweet!

Munch, Crunch!

A Quick Snap Blurred This One, But The Sentiment Is Still Profound!

Kind And Thoughtful Auntie-Belle!

So Many Books! Wonderful Idea For Any Age!!!

Cards and Letters Are Awesome! Kaylee Adores Them!

Puzzles And Activity Books To Encourage A Growing Mind!

Birthday Ribbons Are The Best!

Because "Hi Kitty" Boots Are A Must!

Enjoyable Company!

Gifts Are Already Being Put To Use Before The Night Is Out!