Showing posts with label Hens. Show all posts

Tuesday, March 18, 2014

Bigger Coop On A Dime, In Far Less Time

Now that you have all your chicks that you want to raise into hens, it's time to start thinking about your coop! You won't need to build it for awhile, since the chicks are so little and need hands on care in their first months, but you might want to plan ahead! You could build one out of pallets and scrap wood as we did here, but we are a rescue home for hens, and our latest addition overpopulated our quaint coop without so much as the peeps from baby chicks, warning you they will be full grown soon! So we needed a speedy solution, that didn't cost as much as a Rainbow Play System! This is the gem we found!

The total price was less than 100, delivered within a week, and assembled in less than 2 hours by this lone lady! Plus, it comes with built-in shelves, or shall we say "roosting beds" that cover with hay and straw quite nicely! Additionally, it gave us a convenient place to hang the water dispensary, while providing dry shelter for extra hay (because why build a hay box when you don't have to?! We used to store ours in trash cans, resulted in Blister Beetles...OUCH!), not to mention a convenient door to let myself in and out, and easy access to all of the lovely eggs! But wait, it gets better, it's a greenhouse...so...it heats itself! It has an easy spot to hang my heat lamps, should I want them, but most days it's unnecessary! (PS, I know that heat lamps are controversial. My stance is DO NOT strain your hens! Hens were bred for unnatural amounts of production, which is strain enough already. So if your girls continue to produce eggs in 18 degree weather, then by golly, give them the cozy comfort of a heat lamp! Just don't introduce it if production is dropping off in defense to the weather.)

The only thing we added to the coop was some shelving. We had roosting boxes already made from the last coop we had, so we stuck 'em in there! We added plywood shelves to top the mesh ones that came with it, hello free pile! Just add a 2 inch lip around the piece of plywood, extending the front and rear edges to 3 inches and offsetting them so they reach below the base of the shelf, this way they will nestle onto the shelving and "hook" themselves there. Secure, and able to hold that fluffy straw that slips through the mesh shelves!


The instructions consist of a picture of the completed product, so I thought I'd show you the steps!


Now just tie on the tarp to complete the greenhouse chicken coop!


The ladder is SUPER easy and free to make! Just pallet wood, cut it into 1x1x6 strips, then nail the rungs with a nail gun! 


Our 4x4 spans the width of the coop and rests on the shelving, so everyone has easy access to water!


Just remember to open her up when it gets sunny, because it gets toasty in there, quickly! You can see my heatlamp, but I just put it in for picture purposes, it was warm enough to take it out shortly after! We also used pallets to make a mini deck for the whole thing to sit on, so that when it rains it doesn't soak up through the floor (wet feet is terrible for hen health!!) and after slipping on the tarping, we nailed on a wood surround as a sort of sleeve to keep the sides down an intruders out!


And if you zip it ALMOST all the way closed, they can slip in and out easily!


How's that for some inventive henning solutions?!


Tuesday, March 4, 2014

Chicken Water Dispensary

Chick Day is coming to our local feed store (March 8th) so I imagine the chicks are coming to your area too! Be prepared with this quick and economical water dispensary for your brood...

First start with those lovely 5 gallon buckets I'm such a fan of! Then drill six or so holes in the bottom of the bucket, with a 3/8" drill bit.

Purchase a bag of chicken nipples, and use the threading tool included to make threads for the nipples to screw into your holes. Now wrap PTFE Thread Seal Tape around the ends. Screw the tip into the drilled hole, the tape will act as a water-tight seal. And presto!


Now all you have to do is find a place to hang it! We took a 4x4 and straddled pre-existing fence posts to start, screwing in a large 100lb rated hook for security! That board is easily relocated to their new coop, which has built-in nesting boxes, for easy access. 


You can also purchase chain link by the foot at your local hardware store, the pound rating will be on the tags of the chain, to lower the height of your water dispenser. 

It will take a couple days for the hens to figure out that's where the water comes from, but for 13 hens, it lasts 2 weeks! You can leave the top open to collect rainwater in the rainy season, or you can drill a hole in the lid with a hole saw, lid it, and stick a water heater in the hole for those icy months when water freezes quickly. The option of mostly lidding it also keeps dirt and feces out, because they will want to roost on it...silly hens! 


Wednesday, February 19, 2014

Chicken Feeder

Remember that Ace Hardware bucket I used for making coffee dirt?! Well I told you that I usually use Home Depot buckets, despite the aesthetic disadvantage because of their price...and here's proof!

For 13 chickens, you need a viable dispensary that all those beaks can peck at once! This is our cheep, cheep, CHEAP solution! ^_^


To make the feeder, all you need is a 5 gallon bucket and lid, a plastic dish/tray, a hole saw and drill, and a handful of screws. The whole idea was Brandan's, and it was quite the ingenious invention!


Available at Home Depot, or any local hardware store, is the 5 gallon bucket; in the neighborhood of $2.78, the lid is an extra dollar. Also at the hardware store is the screws, for less than $3, and all you need is 5--we chose black wood screws for strength and rust resistance. Keep looking here for a hole saw, depending on your drill and brand preference, the bit should be around $10. This is the one we got, on Amazon:


Now drill trilateral holes at the bottom of the bucket, so that when feed and grain is poured into the top, it will spill out the holes.


The plastic feeding dish was purchased at a feed store for a little over $15, and I'm sure you could hunt around to find something that works for a more economic price, but the rescue chickens all came on fast, so we needed something now! Attach the dish to the bottom of the feeder bucket, so as to create a trough of grains!


And you're finished! Just mix up your grains, pour, and lid the entire bucket. While the lid is water-tight, the trough is not, so you will still need to stick it in a semi-dry area.


We purchased multiple buckets and order all of our grains from Azure Standard. I use The Elliott Homestead's Chicken Feed Recipe, since it is Organic, Non-GMO, and Soy Free! It is cheaper than buying organic (or even non-organic!) bagged feed from the feed store, and cheaper than premixed organic feed from Azure. It is smart to constantly check for what they term "chicken wheat" because it is almost half the cost of the regular wheat berries, just because it is the remnants from cleaning the mill and not fit for human consumption! 


I also recommend buying the 50# bag of kelp granules, because they won't go bad and are SIGNIFICANTLY cheaper per pound. I adapted the Elliot Homestead recipe to suit my hens, as they are free range for the majority of the year and do not care for oats (I believe this is because they get their protein from other buggy sources) and will pick them out instead of eating them! 

Not this little guy! He only lasts one and a half feedings!

I used to fill each bucket up with a different grain, but now to save time, when I get the order home, I mix up all of the feed (sans the oil and kelp called for in the feed recipe) into each bucket. One bucket lasts me one month, so I can mix up 6 months worth, store it under our deck with the watertight lids, and keep the small excess of kelp and various seed remnants in their bags, stashed away. This way it takes up far less time, and does not take up a ton of room to store 6-8 buckets. It all depends on where your storage is.


It is awesome to have little helping hands do your work for you too! You can be working on one bucket, while they do another!  


Mixing all of the food into individual buckets also helped me sort out the price. One order of feed stuffs (minus the excess kelp) was $210. I mixed up 7 months of feed, making it $30 a month to feed my hens. Throw in one bale of ultra-compact straw for $10, and that makes $40 a month, or $10 a week. I get about 4 dozen eggs per week, which means I need to sell them for about $2 a dozen to break even. Sometimes I get 6 dozen, which turns a profit, or pays for a little heat lamp when the average temperature is 18 degrees (wait, Seattle, say what?!), or upsizing the coop! 


We do not "Date Stamp" our eggs anymore, because they are purchased up so quickly, and one buyer pointed out that not only do eggs last a significantly long time (longer if left unwashed), as in 6 weeks, but also our stamp ink is probably not organic! You could buy organic ink...we have some for other purposes...but if your turnover is high, the stamping is insignificant!

Friday, January 31, 2014

The Nearly Free Chicken Coop!

Chicken season is coming, and about this time two years ago we were scouting free wood piles and picking up all sorts of pallets that local businesses tossed to the curb. Sure, they can use wood recycling, but a lot of places just keep bins of wood, which is not only amazing for your wood fire, but it can be upcycled into projects like this!


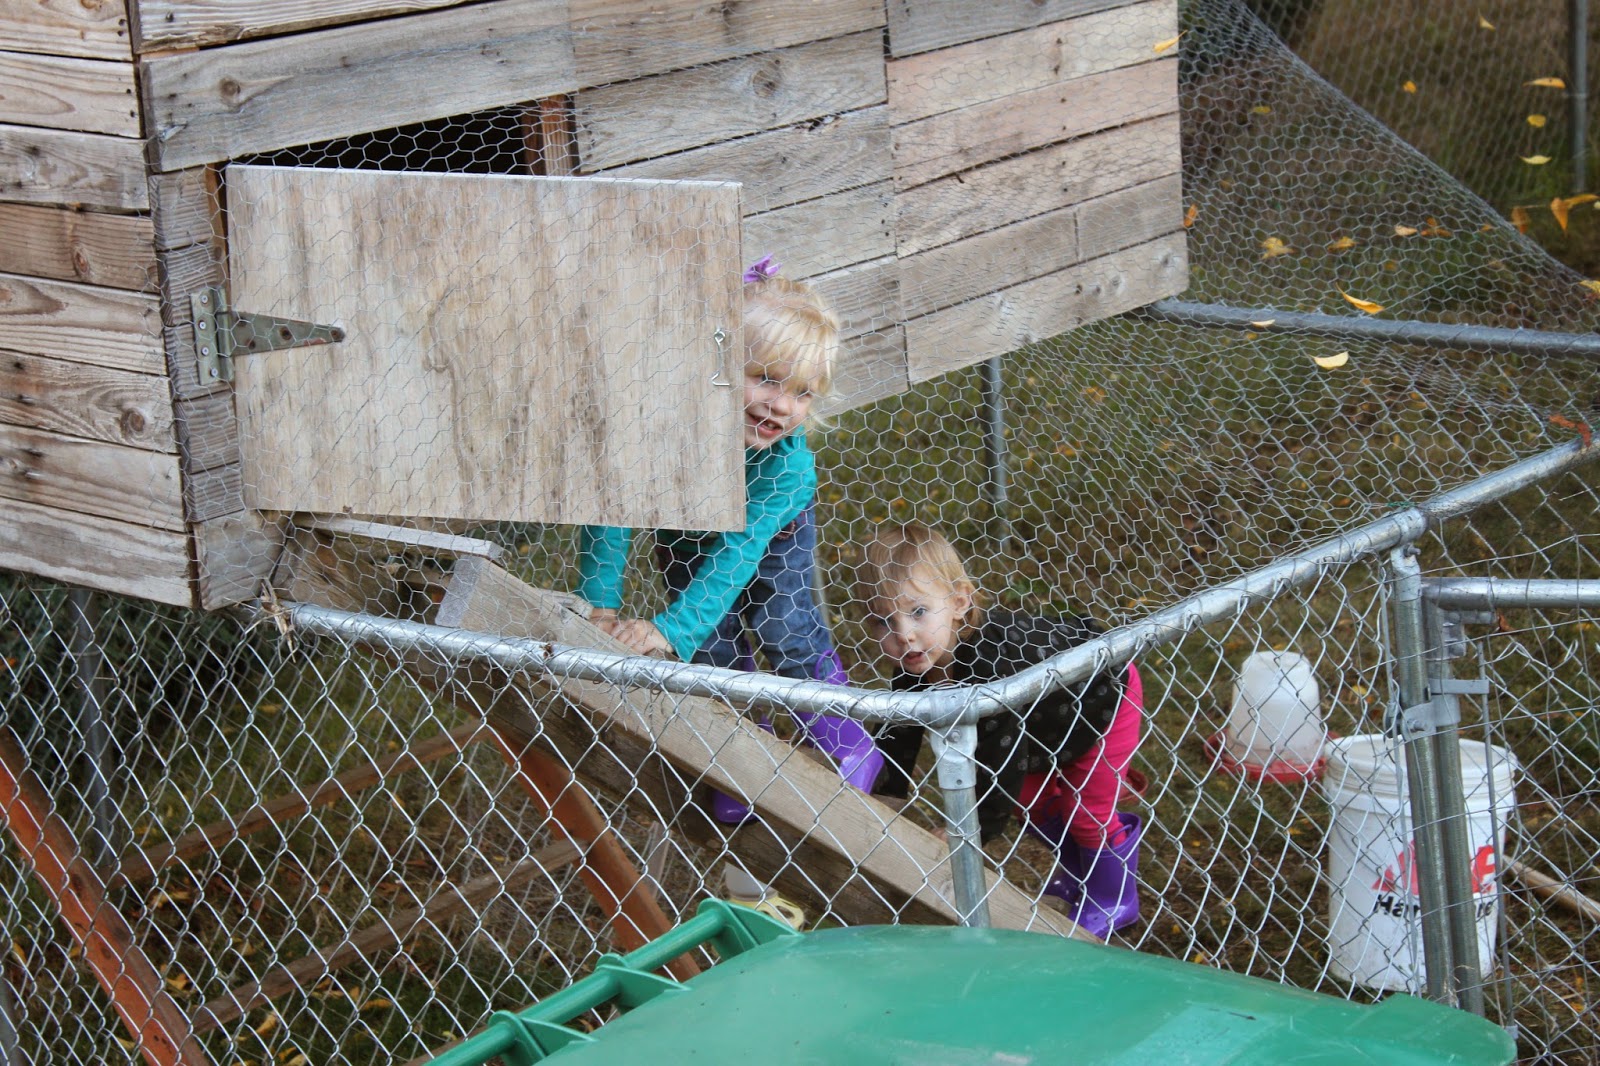
We only had 4 hens at that point in our venture, so an enclosed space was nice, and the previous residents in our home left this nice sized dog kennel, which provided elevation for our birds and the enclosure we desired. However, you do not have to elevate yours as we did, I would recommend 8 inches so that it is off the ground during rainy weather, but space enough to make it drafty and unappealing to vermin and giving your cleaning shovel space to scoop out the junk, all while providing the ground underneath it a breather, because you will want to move it! Penned chickens ruin the ground, which is why we let ours free-range most of the time!


So your first task is to collect as much wood as you can, you can return what you don't need, or burn the excess! Most of our wood was nailed together, so we worked hard to pull out all of the nails, sometimes sawing them off if they were stubborn, in order to free the planks on the pallet! Now take the sturdy frame of the once-pallet and use those 2x4s to make your own frame! Box shaped bottom, bracer in the middle, then upright posts at every corner and middle, but make sure one side is taller than the other by 6 inches to allow for a slanted roof to properly shed rain. Frame out the top as you did the bottom. Then take all of the blanks you removed from the pallets and use them to make a floor (unless you found sheets of plywood in someone's free bin, that would be lighter and better!) and walls, and roof. Use a nailgun to make this process faster! There will be some holes in between the boards, but try to get them as tight as possible, my chickens did not mind through the winter, and honestly I think a little fresh air kept them happier. I always made sure that they were toasty and cozy through the coldest days! For the back of the coop, we used a sheet of plywood that opened on a hinge, and hooked closed at both ends at hook and eye loops. Then you can clean it out and collect eggs easily. Don't forget a door, which is also easily made of plywood, hinge, and hook and eye closure!


These are the model plans we used to base out pallet coop off of! Since Brandan works at a sheet metal company, he was able to snag a piece of corrugated sheet metal for the roof, but you could use corrugated plastic for a cheaper option, or scout any metal manufacturer's recycle bin! For more plan details, click here, otherwise we used just the basic dimensions and replicated what we could.


A simple addition is feeder houses, which are useful for keeping food and oyster shells dry. They are simply made, and even the kiddos can help decorate!


This coop was free aside from the hinges and hook and eye closures. You might accrue a little more, but scout craigslist for awesome chicken run fencing, or any scrap wood if you don't have any free wood recycling bins nearby!

Happy henning!!!