Showing posts with label Recipes. Show all posts

Friday, May 16, 2014

Double Chocolate Freezer Cookies! (Gluten Free Vegan)


Our family is vegan by choice, for health, for our children's health, for not supporting animal cruelty, and even for the eco-friendliness! Being vegan has it's challenges, and I can't say I've met every one with tenacity and vivaciousness, but we more than manage. Now apparently, I wrote in some journal somewhere about a year ago that I wanted to go gluten-free too one day, oh and all organic, that'd be nice to afford. But those were luxuries to me, heartfelt desires that were just goals and faraway dreams. Until February. 

My hands have been rid with eczema since before Kaylee was born. It started around my rings, and even in taking them off when fingers swelled in the late summer heat, I never could get rid of it. It got so bad that it hurt to touch water. So finally after almost 4 years of just dealing with it, I went in. I got creams, suggestions of suspending hand-washing, and the cop-out of "you'll just grow out of it." 6 months later I was out of cream subscriptions, and I really don't like daily doses of steroids on my hands, thanks! So I took it up with my girls' naturopath. A blood screen for allergies came back with gluten! Not just gluten, but wheat itself, all parts. So it looks like my dream became a reality...FAST!

I fought it! I had gluten blues, that hankering for my Wheat Thins, a good roll, a decent tortilla to wrap up my burrito. Depression and all out hormonal craziness for a whole week, about a month or so after cutting off gluten, is normal, so if you venture this way, be warned!

So from here on out, all of my recipes will be GLUTEN FREE VEGAN!! And you probably won't find an assortment of sandwiches, we have just learned to eat differently. Now I'm blessed with the best gal, Karina, who knows her way around gluten-free goodies: The Gluten Free Goddess!! So MANY of my recipes are inspired by her! 


But the sunshine is the inspiration for this recipe! Cold, slightly crisp, but chewy, fill your mouth up goodness, oh so perfect for hot summer days...


Double Chocolate Freezer Cookies!


Makes 5 dozen (but I doubt they'll see it to the month's end around here!)

Ingredients:

2 Cups Sorghum Flour (Also known as Jawar or Milo Flour...sold on AZURE STANDARD!! YIPPEE SKIPPY!! And Oh So Much Better than rice flour!)
1.5 Cups Potato Starch (not potato flour! Use Tapioca Starch if you don't have potato starch)
1 Cup Coconut Flour (Don't have coconut flour? Try another sweet flour like Almond or Oats)
2 Teaspoons Xanthan Gum
2 Teaspoons Salt
2 Teaspoons Baking Soda
2.5 Cups Sugar (Packed Brown is best)
1 Cup Olive Oil
2 Cups Soy Milk (Vanilla, or Plain) + 4 Tablespoons Corn Starch
2 Tablespoons Vanilla
1.5 Cups Chocolate Chips, DIVIDED
         or
1/3 Cup Cocoa Powder + 1/2 Cup Chocolate Chips 

Directions:

Preheat the oven to 350


In a large bowl combine the dry ingredients; Sorghum and Coconut Flours, Xanthan Gum, Salt, Baking Soda, Sugar, and 1 cup of the Chocolate Chips (or the cocoa powder if you went that route!) Whisk to fluff and combine.


In a measuring cup, whisk the Cornstarch into the Soy Milk, you can do this step in two rounds if you don't have a 2 cup measuring cup. Microwave the mixture for one minute. Remove, whisk, return to the microwave for 30 seconds, remove, whisk, repeat. For 1 cup of milk it usually takes 2 minutes total, with the full 2 cups, it usually takes 3 minutes. But on that last whisk, the cornstarch-milk mixture will congeal. 

Pour the thick "vegan eggs" onto your dry mix. Add the rest of your wet ingredients; Oil, and Vanilla, then mix.


Mix for 5 minutes, as I've found sorghum to be a sneaky bugger and hides in pockets! Because you poured warm "eggs" onto chocolate chips, they should melt and turn the whole batter brown! After the batter cools, add the rest of the chips in to make a double chocolate wonderfulness!


Spoon the batter onto cookie sheets, watch out--they spread!


Bake for 14 minutes. If you did multiple racks of cookie sheets like I did, rotate at the end of 14 minutes and bake for another 3 minutes.


Remove the cookies and allow them to cool for 15 minutes on the counter. Then, using a spatula, re-home cookies to a container or plastic freezer bag. Allow cookies to set in the freezer for an hour before eating! 


Trust me, they're a crumbly mess if you don't!!

Now that's a cool and refreshing, delectable treat!! 

On the left, freezer cookie, on the right "salvaged" left-at-room-temp cookie!


And you know, I've been completely gluten free for 2 months now, and no, my hands still have eczema, but it's not nearly as bad as it was. Since the switch, my belly isn't so bloated all the time, and neither is Kaylee's! That's worth the switch right there! And, when I started divvying up wheat for my hens, halfway through my throat and lungs started burning, my nose started running, my eyes got all itchy and watery...sooo it took weeding it out for my body to figure it out, but I don't think it'd like me too much if I turned back now. So here's to loving new food! And NEVER feeling guilty about one ounce of it! 

Friday, February 14, 2014

Sultry Valentine's Treat: Pots De Creme! A Vegan Chocolate Mousse with Rum!

I originally got this recipe from my mom, who makes it every Christmas, and I adapted the original recipe to make the vegan equivalent. It is perfect for a love-filled holiday that demands a decadent dessert, whether you have a special someone to share it with, or you will be enjoying it all to yourself!!!


Pots De Creme
Vegan Version of Rum and Chocolate Mousse


Ingredients:
2 cups Semisweet Chocolate or Carob Chips
1 can (14 oz) Coconut Milk
1/4 teaspoon Salt
2 teaspoons Vanilla
1/4 cup Sugar
1 cup Soy Milk (vanilla soy works just as well in this recipe)
2 Tablespoons Cornstarch
6 Tablespoons Rum

Two EXCELLENT variations are: 6 Tablespoons Coconut Rum, or 6 Tablespoons Butterscotch Schnapps in place of the plain rum. The flavors in the alcohol will infuse with the chocolate and produce a truly divine mousse!

Directions:
Step 1: Place the chocolate, salt, vanilla and sugar in a medium size bowl.

Step 2: Pour the coconut milk in a medium saucepan, and bring to a low boil, a light simmer is perfect. 

Step 3: While you are bringing your milk to a simmer, in a separate microwavable bowl, combine the soy milk and cornstarch. Heat on high in the microwave for 30 seconds at a time, whisking at each interval, until the mixture thickens (calcification). In this recipe, that usually takes 1:30 to 2:00 minutes. Then add both the coconut milk and the calcified soy and cornstarch to the bowl of chocolate.

Step 4: Add the Rum, Coconut Rum, or Butterscotch Schnapps while the mixture is still hot and whisk to incorporate. 

Step 5: Pour into individual pots or glass cups for 1-4 hours, or freeze for 30 minutes and return to fridge, to allow to set up. If no individual cups are available, a large pyrex or rummikin can be used instead, it will just take longer to set up!


ENJOY!!! And oh, good heavens, you will!!!


The original recipe calls for half of everything listed in the ingredients (I needed to double them in order to require 1 full can of coconut milk), and calls for 3/4 cup whole milk in place of the coconut milk, and 1 egg instead of the Soy milk and Cornstarch mixture. They also require a blender and heating only the milk. If you are concerned that your dessert might offend a younger pallet, add the rum to the coconut milk and bring both to a simmer to be sure that all of the alcohol cooks off. The taste will still be exquisite!


Sunday, February 9, 2014

One More Granola For the Collection... Mango Macadamia Granola Delight!

This one is for a little dose of springtime!


Mango Macadamia Granola Delight!

Ingredients:
4 cups Oats, rolled, thick cut, steel cut, or triticale, or combo, anything but quick cook!!!
2 cups raw Macadamia Nuts
½ cup REAL maple syrup (Don't chicken out on me!)
¼ cup Agave/Honey
¼ cup oil
2 cups Mango, dried and chopped
2 pinches of salt


Directions:
Preheat oven to 350 degrees. Spread out oats on a cookie sheet in a thin layer and bake for 15 minutes, this step is crucial in getting that classic granola crunch!
While the oats are a-toastin' combine dry ingredients in a large bowl. In a small bowl combine the wet ones, whisking to combine if necessary.

Add the roasted oats to your dry bowl then douse with the syrup mixture! Stir with a wooden spoon to combine. I suggest mulling your mixture for a solid 5 minutes, because those dry oats like to hide in little pockets!

Now grease that hot little baking sheet! Okay, it should be just luke-warm now... And spread an even layer of wet granola over it. Stick in that preheated oven for 25 minutes. It will still look wet when you pull it back out, just trust me, it'll harden as it dries!

Note: Greasing is IMPORTANT! Or else all of your granola will stick to your tray...and then it becomes a granola-chiseling disaster!


Bon apetit!


Friday, January 17, 2014

The PERFECT Vegan Cream Cheese! (And Sesame Wonton Crackers)

As a vegan, I am not about substitutions, they are expensive, and typically sport just as many chemicals and preservatives as their meaty counterparts. Most importantly though, they hardly EVER taste right! So the consumer is consumed with regret, remorse, and a pallet in retrograde...simply put, it's just not the same! 

After a month of transition when we originally adopted our Whole-Foods-Plant-Based Diet that slipped into blissfully delightful vegan menus, we figured out that it's not about finding a substitute that was permissible for hotdogs, it was about making fried tofu bites with different dipping sauces! That being said, I never post a "substitute" unless I feel like it is par none! The best of the best! And not about the substitute at all, but about making something scrumptious and delectable!

On that note, a perfected recipe one year in the making...


Vegan Cream Cheese (Neufchatel):


Ingredients:
1 Cup Raw Cashews (I buy it in pieces because it is waaaay cheaper)
1 Cup Raw Hazelnuts (All nuts are UN-salted)
1 lb Medium Firm Tofu
Salt to taste (I used 1 Tablespoon)

Makes a delightful 4 cups of decadent vegan creamy goodness! All for a grand total of: $4.13 or about $1.03 per cup/ 8 oz, which is about a third of the price I can snag it for at Fred Meyer or Whole Foods!


Directions:
Soak cashews for at least 4 hours, up to overnight.
Drain cashews and tofu, then add all ingredients into a blender or food processor. Process for 5 minutes or until the texture is smooth and creamy. Due to being whipped up for awhile, it should have a fluffy texture; store in the fridge to set at least an hour before consuming, which will condense some of the fluff, plus cream cheese just tastes best cold!


WARNING: Do NOT soak cashews longer than 12 hours, soaking does get rid of enzyme inhibitors but also will turn them rancid quickly, resulting in food poisoning! I speak from experience! Stick your nuts in the fridge in soaking water if you tend to forget them, like me.

The crackers you see dipped in the cream cheese are my lovely Sesame-Wonton Crackers.

Sesame Wonton Crackers


Ingredients:
1 Package Wonton Wrappers (Wonton wrappers tend to be vegan, check the label)
2 Tablespoons Plain Soy Milk
1 Tablespoon Corn Starch
1 Teaspoon Soy Sauce
1 Tablespoon Sesame Seeds

OPTIONAL:
1/2 Teaspoon Garlic Powder
1/2 Teaspoon Onion Powder

Course Salt 

Directions:
Preheat oven to 300 degrees. 

Lay out wonton wrappers, very little space is needed between them as they will shrink in baking. Cut them all in half, whether they are square or round, so that you have a good chip size! Mix the soy milk and cornstarch then add the rest of your ingredients, aside from the sesame seeds and salt if using. With a basting brush, paint all of your wrappers. It is nice to let a child do this part, because essentially you can't go wrong! Then have them help you sprinkle the seeds and salt on top! Stick them in the oven for 5 minutes, flip the tray around to cook evenly, then bake another 5 minutes more! TADA!!

I like to make the garlic and onion recipe, because they are flavorful but go with just about anything, but you can add whatever flavors you want! Just don't go over a teaspoon of powder, it will get hard to manage. The crackers are good plain as well!

Tuesday, December 10, 2013

Vegan Pumpkin "Cheese" Cake

Vegan Pumpkin "Cheese" Cake

SOAK TIME: 4 hours minimum, up to 1 day

Time: 1 hour 20 minutes
Serves: 12

Ingredients:
2 Cups Cashews, raw and are cheapest in pieces
1 Sugar Pumpkin (Or one can of pumpkin puree)
1/2 Cup Agave
2 Teaspoons Cinnamon
1 Teaspoon Nutmeg
1 Teaspoon Cloves


1/2 Cup Macadamia Nuts, raw
1/2 Cup Walnuts, raw
4 Dates, pitted
2 Tablespoons Coconut Oil

Directions:
Step 1: Soak your cashew pieces overnight. The next day, they will be ready for pureeing!
Step 2: Preheat your oven to  350. Roast your pumpkin by splitting it in half, lopping off the stem, and pitting it of seeds and strings, leaving only firm pumpkin meat. Place both halves face down on a cookie sheet and cover with aluminum foil. Bake for 1 hour!


Step 3: While your pumpkin is roasting, drain cashews and stick them in the blender, puree with agave and spices, then set aside.


Step 4: In a food processor, lightly and sporadically blend the macadamias, walnuts and dates, until the end result is a choppy mess! Then add the coconut oil and pulse a couple more times...be careful not to overblend!!! It will get soupy!


Step 5: Press nut base into spring form pan.
Step 6: When pumpkin is roasted, scoop out the soft flesh from the skin and add it to your blender with the cashew puree. Blend well to incorporate!


Step 7: Pour the cashew mixture over your nutty crust, and smooth over with a spatula.


Step 8: Dust with cinnamon, nutmeg and cloves and freeze or refrigerate!


ENJOY!

My original recipe, adapted from Raw Vegan Blueberry Cheesecake from The Vegan Zombie!

Friday, November 22, 2013

Taco Salad Bowls and Tortilla Chips

Because fancy CAN be quick, and so can fun! We have some sort of Mexican meal charade every Monday, so how do you switch it up? It all lies in the tortillas!


I buy a pack of Costco tortillas, which run $4 for 40 “Burrito Style” large rounds, which are the cheapest way to do it, bar none! We make burritos, chimichangas, fry them up flat for tostadas, cut them in half, stuff them, and roll them up reeeeally tight, then fry them and call them taquitos! We also make tortilla chips! It is cheaper than buying a bag of premade tortilla chips, it is in contact with less preservatives and salt, it is also more filling and made with better ingredients, and they are MUCH sturdier! You want a chip that was MADE to load on the dip?! That's my House Tortilla Chips! You can also make cutesy little bowls out of them and fill them to the brim with 7-layer dip, or a taco salad!

House Tortilla Chips

Yeild: 8 chips per tortilla, 1-2 tortillas per person is usually sufficient!
Time: 15 Minutes

Ingredients:
Tortillas
Salt to taste
Oil

Directions:
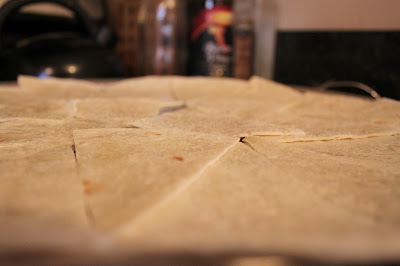
Preheat your oven to 350 degrees. Count out how many tortillas you need to feed the mouths at the table. Stack and cut them, four at a time works best, with a pizza cutter or even a butter knife! Cut them like you would a pizza; half width-wise, half height-wise, half at a 45* angle, half at a -45* angle! Voila, 8 pieces! On ungreased cookie sheets, lay out your little triangles, try to cram as many onto one tray without stacking them! Now take a brush and dab it in oil, lightly coat each chip with a little oil. (I have baked without oil, which works just fine, oil is just, well...better!) Now sprinkle a light layer of salt over the tray, one cookie sheet is usually due for about 2 teaspoons of salt, but you can do more or less as you like! At this stage you can fancy it up with some paprika, garlic powder, onion powder, pepper, a little bit of lime juice splashed on top, or lemon pepper! Or not! They are SO GREAT by themselves! Last step is to stick them in that oven for 10 minutes, start watching at 8 minutes though, in a convection oven or with slightly smaller tortilla rounds, they are prone to burning!


MMMMMM! Fresh out of the oven chips!!! YEAH. That's what I'm talkin' bout!

House Tortilla Bowls

Yeild: 2 bowls per tortilla, 1-2 tortillas per person is usually sufficient!
Time: 15 Minutes

Ingredients:
Tortillas
Salt to taste
Oil

Directions:
Preheat your oven to 350 degrees. Count out how many tortillas you need to feed the mouths at the table. Stack and cut them, four at a time works best, with a pizza cutter or even a butter knife! This time, only cut them in half once! Take the corners of each half-round and bring them together, pull one edge a little past the other, forcing a fold in the tortilla. Stuff it in its cone-like shape into a muffin tin, pressing on the bottom to try to achieve a flat-bottomed bowl, and no worries, every fold in that bowl is a welcome guest. Use a VERY light smattering of oil if you would like, I personally think it make the bowls cook better! You can also add a dash of salt to the whole muffin tin of tortilla bowls, but it is not necessary and I usually skip because a taco salad is my typical goal. Then just stick those muffin trays in the oven for 10 minutes, watching again at 8 of course! You can use corn tortillas for chips or bowls, they need a little extra time in the oven, and they harden up more after you take them out of the oven and let them rest a bit. Do not use oil with corn tortillas, they will NEVER harden that way!


Flour on Left, Corn on Right


TADA!!! Quick, painless, cheaper, healthier, and YUMMIER!


Wednesday, November 20, 2013

The “Family Dinner” Style Birthday Party

THE WINNER OF THE DIAPER GIVEAWAY IS:
ANNIKA MANCHESTER!!!
Please Send Me Your Address So I Can Ship Your Winnings To You!


So after taking birthdays bake down to their origins, starting with Momma, we open up the
holiday to family, making a wonderful family dinner that everyone can come together and enjoy, celebrating wonderful life with us! Basking in all the love, cherishing each other, and sharing AWESOME food, if I do say so myself! The Family Dinner also provides the opportunity for grandparents who can attend to shower the little lady with love, and celebrate her, it's the perfect little space that honors family connections. Eventually, it's just not going to be feasible to invite grandparents and uncles to the “kid party” the girls share, even this year we are running out of space to invite all the extended family. That is where the Family Birthday Dinner takes the cake! We are able to round up as many uncles, aunts, cousins, and grandparents that we can and celebrate it all together! Then the kid party has its space, birthday day with momma has its space, and we have just one more excuse to have a grand time!!!

For Kaylee's Family Birthday Dinner, I hosted 14 guests alongside our 4-person family. And what to feed a 18-person brood? The Haertel Riesling Pasta! Mango Walnut Salad! Biscuits shaped like butterflies! And a gorgeous, melt-in-your mouth, Blueberry-Cashew Cream Cake!

The Haertel Riesling Pasta is entirely my own design. I first invented the recipe when I was not vegan, three years ago, and back then I called it Shrimp Pear Sake, this is because the original recipe called for sauteed shrimp and any Pear Sake I could get my hands on! Since we are vegan now, we do not eat shrimp (plus, River has an allergy to shellfish, who'd have thunk?!) and Pear Sake is hard to come by, plus it's usually not worth the price, so I reinvented the recipe using Riesling! My favorite is Kung Fu Girl! Many would say that it is an insult to consider a wine a cooking wine, because they have cooking wine for that purpose, however, as the name suggests, it is necessary to use a wine you like for this dish! The undertones of the wine you use become part of the exquisiteness of the pasta! Shrimp Pear Sake actually tastes like pears! Kung Fu Girl is the closest mimicry to this flavor, and she's only 9 bucks a bottle on average!

Shrimp Pear Sake

Cook Time: 30 minutes
Yield: 4-6 servings

Ingredients:
1 # Shrimp
1 # Noodles
¼ Cup Flour
2 Tablespoons Sugar
½ teaspoon Salt
½ cup Butter
1 1/3 cup Milk
2/3 cup Pear Sake
½ cup Lemon Juice
1 teaspoon Thyme
2 Tablespoons Chives

Haertel Riesling Pasta

Cook Time: 30 minutes
Yield: 4-6 servings

Ingredients:
1 # Seitan or other Vegan Sausage
1 # Noodles
¼ Cup Flour
2 Tablespoons Sugar
½ teaspoon Salt
½ cup Coconut Oil
1 1/3 cup Plain Soy Milk
2/3 cup Riesling
½ cup Lemon Juice (Lime is good too!)
1 teaspoon Thyme
2 Tablespoons Chives
(1 tsp Parsley and 2 Tbs Italian Seasoning is also a good mix in a pinch!)

Instructions:
Sautee your shrimp or sausage, you may add salt and pepper to taste at this stage. Bring a pot of water to a boil for your noodles. Melt your butter or oil in a medium saucepan. Mix up your flour, sugar and salt in a small bowl then add it to the melty goodness. Stir until all of the flour soaks up the liquid, then add the remaining ingredients! Whisk until smooth and creamy, then bring to a boil for 1 minute to cook off the alcohol, stirring constantly. Then reduce to a simmer. Cook up your pasta noodles, drain, and combine all three pots of goodness together!


Mango Walnut Salad: Baby Spinach, 1 Mango diced, 2 Avocados diced, 1 Red Onion minced, and some poppy seed dressing...YUM!


And the finishing touch is Blueberry Cheese Cake! From Vegan Zombie! The “cheese” is actually pureed cashew, and the crust is raw in his directions, but I like to bake my crust on 200 for 15 minutes. Either way is crunchy good!

To top it all off, all of the dinnerware was compostable, so there was zero waste!

Now on to party pictures!!!

Had To Steph!!!

Can You Believe HE Is Her Uncle?!

Momma With Babe...So Sweet!

Munch, Crunch!

A Quick Snap Blurred This One, But The Sentiment Is Still Profound!

Kind And Thoughtful Auntie-Belle!

So Many Books! Wonderful Idea For Any Age!!!

Cards and Letters Are Awesome! Kaylee Adores Them!

Puzzles And Activity Books To Encourage A Growing Mind!

Birthday Ribbons Are The Best!

Because "Hi Kitty" Boots Are A Must!

Enjoyable Company!

Gifts Are Already Being Put To Use Before The Night Is Out!