Monday, February 17, 2014

Ready to Start Gardening?!

First off, it's February, I know. But if you know my house, you will understand that just last week one day was filled with 7 hours of chores, one day with 4 hours of once-a-month grocery shopping, and three days were filled with 25+ hours of baking. That was one long week, and the rest of the month will pale in comparison by only a quarter of the same work, however, it always gets busy. You know what I'm talking about--you bust your booty to pre-make all the burgers you could ever want, but the time you saved is filled with something like all the doctors and dentists appointments you thought you were caught up on. So in my house, I start my garden early! I'm making my new topsoil already, (although next year that will start earlier) and I'm digging out all the adorable walkways that just end up providing a diving board for the grass to jump off of and attempt to smother all of my crops!


Next is the list of every single seed I have, from saved seeds to flowers! I may not choose to use all of them, but I sure enjoy being able to select what my garden will look like this year. I also like to use WinterSown for a small variety pack of edibles and tomatoes, to be fair, they do mix flowers in with the packet I call "edibles" which is nice as sacrificial plants for your garden. You can even let them pick the plants that will most likely grow in your area, 6 varieties for a total of 3 stamps!!!


Now, I don't know what gardening method you intend to use, but I have the tool for whether you want to square-foot garden, or conventionally garden! It's the Territorial Seeds Vegetable Garden Planner! You can plan everything you want in your garden, place every plant, and get little tips on comparison crops, sunlight requirements, the works! Then you don't have to write it all out on paper, which I've done...soooo not efficient, and the best part of it is that if you want to just plan for this year, they offer a 30 day free trial! I purchased a two-year block for $40, and it is well worth it! (I found a coupon code that's good until the end of this month, I'm not sure if it applies to their Garden Planner, but it's worth a shot! NTWJA1 )I tell them all of my plants, they produce a crop-planting schedule, and remind me by email when I need to start the plants indoors or directly sow outside!

On top of all of that, they send you wonderful Youtube videos of gardening tips, from natural pesticides to crop rotation, all in a lovely British accent that makes gardening seem like a cup-o-tea! All of the Youtube videos are free, and can be found in succession if you click on the video below.


This is my last year's garden. (Click to go to the published page!) To be noted, none of my cucurbits or squash thrived for long, as they all got a mildew I couldn't compete with...catch it early and you can save your crops, catch it late and it's an uphill battle. The pumpkins were eaten by slugs, another reason why I'm removing the grass catwalks, as I can bait slugs easily and take away their hiding places. Thankfully most of my garden produced early so it wasn't a total loss. I learned a lot, such as not planting towards the end of the acceptable planting window; just isn't smart for my cold pocket of a neighborhood.


Here's my new plan, based on what I've learned! Click here for the published page!


Going back to your list of seeds, write down how many of each you have. I am going to have a large garden, so knowing the quantity of each variety that I have helps me plan the layout. Start your plan by blocking out your garden space. If you're doing container gardening, just add all of the area of the pots and containers you plan to use in a manner that you can remember which pot goes where!

Now the fun part begins! I have found it's easiest to go through and pick out which plants need the least sun, or the most sun and place them in the respective spots in the garden. My garden has a slight slope to it, so I also know that towards the west side, the water will pool, so don't stick lettuce or carrots there, they will crack and rot! After your special needs areas and plants are taken care of, the Garden Planner can help with placing some companion plants, that help you move on through your list. The main thing to remember is that even with the most precise planning, things can deviate from the plan and your garden may not be best suited for certain crops you thought would be a perfect match! Go through some more of the Territorial Seeds videos for tips and tricks to choosing how to plant your garden the most optimally. 

Last pieces of advice, SPLIT UP large plots of plants in the same family, they create hot zones for pests! I also would say that if you are planting in succession to produce crops all season, 4 weeks between plantings was optimal for me! It's all trial and error, and you will learn how your garden works best!

Friday, February 14, 2014

Sultry Valentine's Treat: Pots De Creme! A Vegan Chocolate Mousse with Rum!

I originally got this recipe from my mom, who makes it every Christmas, and I adapted the original recipe to make the vegan equivalent. It is perfect for a love-filled holiday that demands a decadent dessert, whether you have a special someone to share it with, or you will be enjoying it all to yourself!!!


Pots De Creme
Vegan Version of Rum and Chocolate Mousse


Ingredients:
2 cups Semisweet Chocolate or Carob Chips
1 can (14 oz) Coconut Milk
1/4 teaspoon Salt
2 teaspoons Vanilla
1/4 cup Sugar
1 cup Soy Milk (vanilla soy works just as well in this recipe)
2 Tablespoons Cornstarch
6 Tablespoons Rum

Two EXCELLENT variations are: 6 Tablespoons Coconut Rum, or 6 Tablespoons Butterscotch Schnapps in place of the plain rum. The flavors in the alcohol will infuse with the chocolate and produce a truly divine mousse!

Directions:
Step 1: Place the chocolate, salt, vanilla and sugar in a medium size bowl.

Step 2: Pour the coconut milk in a medium saucepan, and bring to a low boil, a light simmer is perfect. 

Step 3: While you are bringing your milk to a simmer, in a separate microwavable bowl, combine the soy milk and cornstarch. Heat on high in the microwave for 30 seconds at a time, whisking at each interval, until the mixture thickens (calcification). In this recipe, that usually takes 1:30 to 2:00 minutes. Then add both the coconut milk and the calcified soy and cornstarch to the bowl of chocolate.

Step 4: Add the Rum, Coconut Rum, or Butterscotch Schnapps while the mixture is still hot and whisk to incorporate. 

Step 5: Pour into individual pots or glass cups for 1-4 hours, or freeze for 30 minutes and return to fridge, to allow to set up. If no individual cups are available, a large pyrex or rummikin can be used instead, it will just take longer to set up!


ENJOY!!! And oh, good heavens, you will!!!


The original recipe calls for half of everything listed in the ingredients (I needed to double them in order to require 1 full can of coconut milk), and calls for 3/4 cup whole milk in place of the coconut milk, and 1 egg instead of the Soy milk and Cornstarch mixture. They also require a blender and heating only the milk. If you are concerned that your dessert might offend a younger pallet, add the rum to the coconut milk and bring both to a simmer to be sure that all of the alcohol cooks off. The taste will still be exquisite!


Wednesday, February 12, 2014

Homemade Valentines! Toddler-Style

Because I <3 art projects, and I <3 Valentines Day, two simple painted valentines your toddler will enjoy!

Valentine 1: Marbled Heart

It's not original, but it's construction paper. It's kludge-y. And so cute!

Supplies:
Construction Paper in Valentines-y colors
Scissors
Sharpie
Small-medium sized Box
Acrylic Paint
3 Marbles
Foil or Wax Paper

Step 1: Cut construction paper into a bunch of rectangles by halving the paper until you have your desired size and amount of cards.

Step 2: With a sharpie, draw hearts in the middle of the rectangle. They don't have to be perfect!

Step 3: Have child place the card in the box, then squirt some dollops of paint in the box around the card.


Step 4: Allow child to wiggle the box back and forth, running the marbles through the paint, then back onto the card.


Step 5: Take shirts off because you can see by how they are starting to paint their fingers that this is going to go south quickly!


Step 6: Step back and enjoy the full on finger and tummy painting session! (I mean, you can't get a more washable paint than acrylic! So don't fret too much!)


Step 7: Since the backsides of the cards are bound to get some sort of paint on them, I recommend placing them on foil or wax paper to dry so that they do not stick to your counter. After they've dried you can add a note in sharpie and sign their name. ^_^


Valentine 2: Sponged Hearts
This one takes more time per card, so is perfect for that special someone...in our case, DADDY!!!

Supplies:
Construction Paper (preferably white)
Scissors
Easel or Window
Tape
Paper Plates
Acrylic Paint in various valentines-y colors
BIBS!
Sponges
Puffy Paint (acrylic, but pen style)

Step 1: Fold your construction paper in half and cut out half a heart on the seam so that it opens into a full one.


Step 2: Tape to an easel or window, somewhere paint will wash off easily when it doesn't quite make it to the card.


Step 3: Arrange different colors around the circumference of a paper plate as a mock pallet.


Step 4: BIB THOSE BABIES!!!


Step 5: Hand them a sponge and their pallet and let them go to town!

Step 6: Paint usually makes it on the front of the card so it is safe to rest on the counter to dry. At this point, write a cute note and sign their name with the puffy paint, and allow to dry.


I recommend the easel/window placement, versus a table top because it's a different angle to improve the hand-eye coordination, and also works on the supinating wrist motion!


So it's not the most creative card, but kids love sponges, and bonus activity at the end is washing out the sponge and watching all the paint disappear down the drain. 


Sunday, February 9, 2014

One More Granola For the Collection... Mango Macadamia Granola Delight!

This one is for a little dose of springtime!


Mango Macadamia Granola Delight!

Ingredients:
4 cups Oats, rolled, thick cut, steel cut, or triticale, or combo, anything but quick cook!!!
2 cups raw Macadamia Nuts
½ cup REAL maple syrup (Don't chicken out on me!)
¼ cup Agave/Honey
¼ cup oil
2 cups Mango, dried and chopped
2 pinches of salt


Directions:
Preheat oven to 350 degrees. Spread out oats on a cookie sheet in a thin layer and bake for 15 minutes, this step is crucial in getting that classic granola crunch!
While the oats are a-toastin' combine dry ingredients in a large bowl. In a small bowl combine the wet ones, whisking to combine if necessary.

Add the roasted oats to your dry bowl then douse with the syrup mixture! Stir with a wooden spoon to combine. I suggest mulling your mixture for a solid 5 minutes, because those dry oats like to hide in little pockets!

Now grease that hot little baking sheet! Okay, it should be just luke-warm now... And spread an even layer of wet granola over it. Stick in that preheated oven for 25 minutes. It will still look wet when you pull it back out, just trust me, it'll harden as it dries!

Note: Greasing is IMPORTANT! Or else all of your granola will stick to your tray...and then it becomes a granola-chiseling disaster!


Bon apetit!


Tuesday, February 4, 2014

The Ultimate Love... Captured in a Belly Cast

Not to be confused as competing with God's ultimate love, I personally venture to say a man and woman's ultimate love is their child!

Not puppy love that twitterpates you in your romantic dating years. Not young love that grows with sincerity and passion, and lingers on into early marriage. Not fur-baby love, although my snuggly cat in my lap would beg to differ!

Children make you do things no other being could expect: We adopted a Vegan lifestyle for our children (because who in their right mind gives up aged cheddar?!); a pregnant mother will stave off sushi and caffeine for their unborn child; and I've heard a man say in encouragement to their toddler, "okay! Go make a big poop, then show me!" We also gave up smoking for our children, and I know our girls kick-started an adventure to healthy, but the point of it all is that we enjoy it, and enjoy them, so we do everything to keep them healthy and happy as well as ourselves.


Kaylee was our first, and a scary adventure, but I had the MOST supportive husband! A surprise, but a welcome one! We figured everything out with her, and she was our inspiration to continue being fun-loving people and just include her in all of it! She was a smiley baby, totally colicky (over milk, so yes I paid my dues, don't be jealous!) and I love her more than myself...


River...she was also unexpected, but I was worn out, and my husband was not exactly excited this time. We were planning on talking about when we were going to have another, but not for a few more months after we found out she was already on her way, and I had to work to be excited for her. Stress came on quickly when we decided our little house was just not going to work, then the house we finally got into needed gutting and remodeling. Our whole lives revolved around stress. Granted, we bonded and teamed together to face the stress (minus the picking the house battle...whoever says it's fun is LYING!), but our contentment and joy ran out the window along with our sanity! I was not breathless with anticipation, but rather anxiety. I hadn't even come to love my new momma-body yet.


But ALL CHILDREN ARE BLESSINGS!!! And I truly do believe that. It's what you do with that blessing that will determine whether you experience the joy. I am determined to enjoy my children, I didn't labor for nothing, that's for sure! So this piece of art is where I learn to enjoy my blessings, and is the symbol of ultimate love.


The project starts when you're in your last trimester, when you feel like a beached whale, and your body is screaming at you, and you're not sure if you want the baby out already, or if you want to keep it in there indefinitely! That is the time. When you are at the peak of what you feel is unattractive.


You can buy a kit, I've picked one up for cheap at T.J. Maxx, or you can just buy Plaster of Paris strips at Michaels, (bring your coupon, of course!) which is cheaper than the most discounted kit I've seen! I had to re-do mine because posture is key, and I would recommend just buying the rolls of plaster tape. Then all you need is a dish of water and scissors. It is best to stand if you can so your belly does not appear slouchy, and apply a thick coat of vaseline. I had the best results using horizontal strips cut to size on my belly, and a mixture of horizontal and vertical strips on my chest, but cut down to half the width so they followed my curves better. Be generous and layer those strips until it looks smooth. Also apply a coat of water over the whole thing at the very end to fill all of the little holes in the mesh tape. When it has dried you can sand it, but only so much!


This process helped me love my body more, even if only for the baby inside! It also gave me some much desired attention from my husband, as he was the one who put all the effort into draping wet strips of plaster all over me!


Since it was so close to River's debut, I never painted my Belly Cast before she was born. Then with the two girls so little and helpless, I had no down time to work on it until she was a year old. Now that she is 2, I have finally completed it! But that is a beautiful thing to have taken so long to finish it, because every time I set to work at it, I would think of River, my love, my mini-me, and Kaylee, her enduring sister, her patient guardian. They are my Ultimate Love! And how befitting that I would finally finish this 2-year project at this "love"ly time of year!


Feel free to Google search "Belly Cast" because MAN are there some BEAUTIFUL BELLIES to get some ideas!!!! Seriously some cute and absolutely gorgeous casts!! Make it yours, after all it's your baby you're lovin'!


Monday, February 3, 2014

The Early Valentine's Day

This is a short word to the wise for men, based on a tip from my Mama...
...don't buy flowers on Valentine's Day!

You will pay exorbitant prices for sloppy stems, and whether you care about being cliche or not, you are not getting a deal that makes the pretty petals worth it. 'Nuf Said.


Instead, try a different approach! You'll remember it's Valentine's Day Month when all the commercials crop up, and the stores are decorated in various sultry shades of red. It should sink in when the term, "February" is used...when you hear it, when you recognize that Valentine's Day is upon you (AKA February 1st or 2nd)...
 ...THEN BUY THOSE FLOWERS!!!

My GORGEOUS Gift Pre-Valentine's Day!!

You will buy better, fresher, sweeter flowers at cut prices! There should be plenty of sales around the first week of the month. Buy the bunches with the most buds, the most closed flowers (my dad knows how to pick the perfect bouquet, and that's part of his secret, beyond that is just his magic touch so good luck trying to best him!) and by the 14th your blooming buds will make their debut. Your lovely lady should feel honored, and if she's like me, she will appreciate being thought of BEFORE the 14th! It's a more genuine impression. Annnd, if you're clever, write up a sweet love letter and ON the 14th, place it by her beautiful bunch! Then you'll get the credit "on the actual day," if she cares about that kind of sentiment.  

Friday, January 31, 2014

The Nearly Free Chicken Coop!

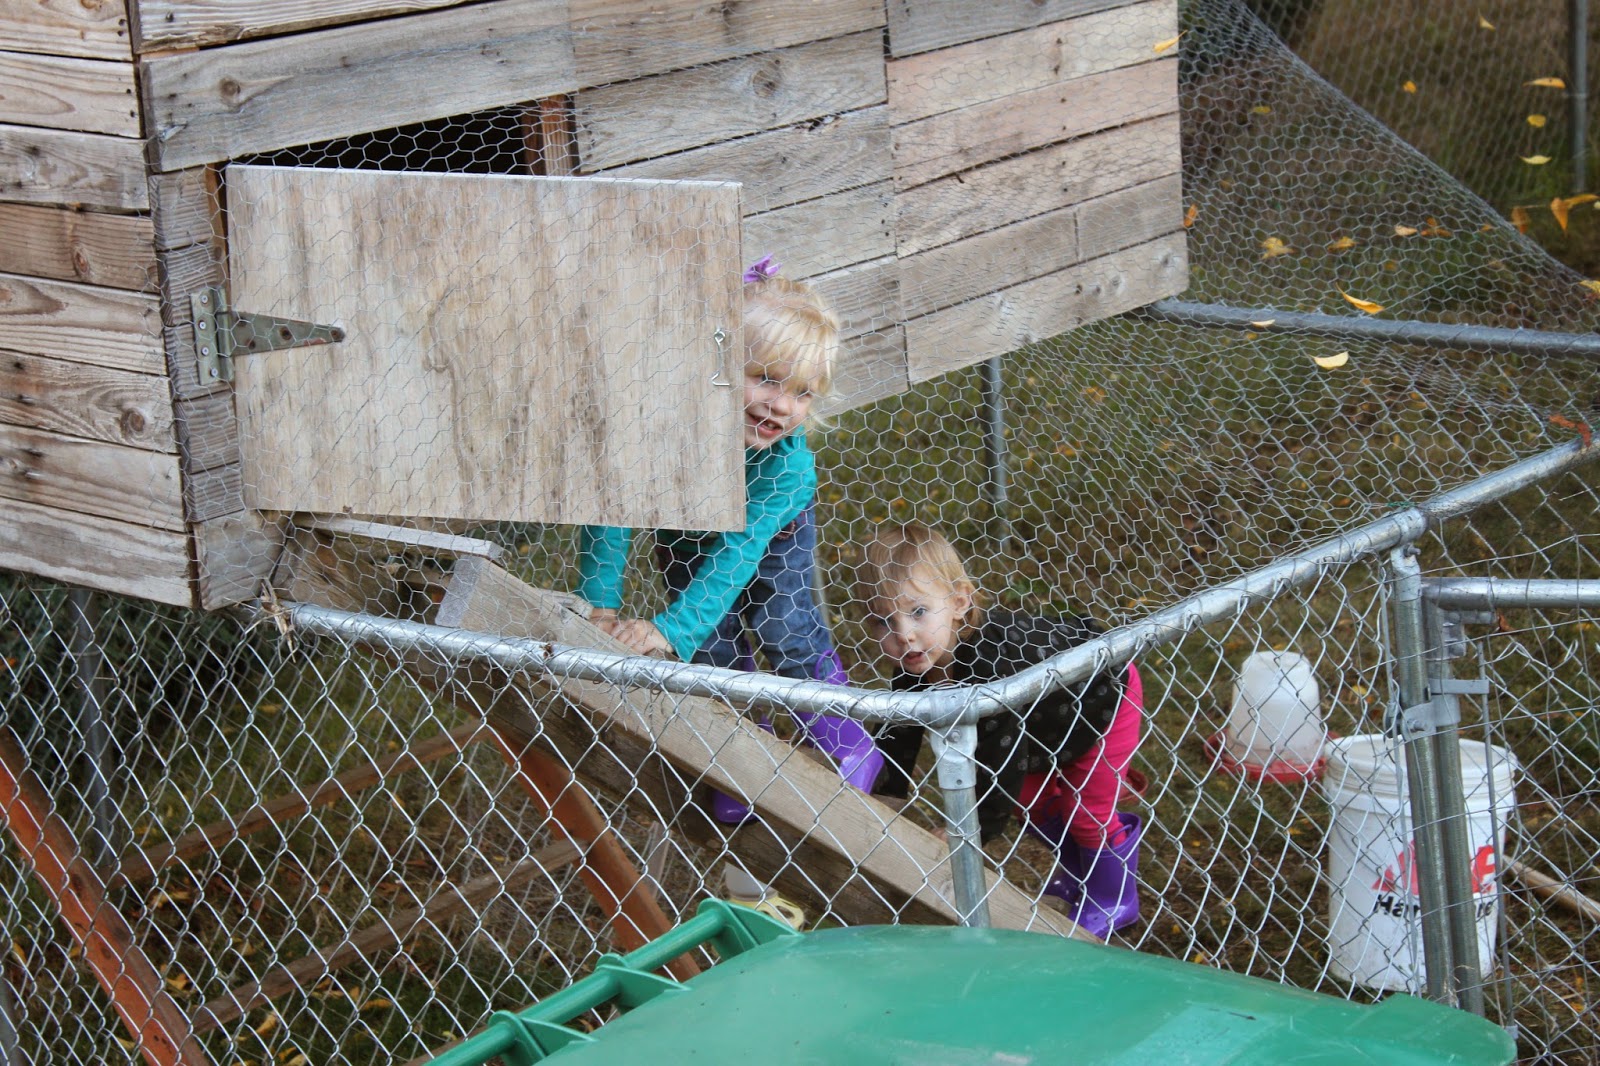
Chicken season is coming, and about this time two years ago we were scouting free wood piles and picking up all sorts of pallets that local businesses tossed to the curb. Sure, they can use wood recycling, but a lot of places just keep bins of wood, which is not only amazing for your wood fire, but it can be upcycled into projects like this!


We only had 4 hens at that point in our venture, so an enclosed space was nice, and the previous residents in our home left this nice sized dog kennel, which provided elevation for our birds and the enclosure we desired. However, you do not have to elevate yours as we did, I would recommend 8 inches so that it is off the ground during rainy weather, but space enough to make it drafty and unappealing to vermin and giving your cleaning shovel space to scoop out the junk, all while providing the ground underneath it a breather, because you will want to move it! Penned chickens ruin the ground, which is why we let ours free-range most of the time!


So your first task is to collect as much wood as you can, you can return what you don't need, or burn the excess! Most of our wood was nailed together, so we worked hard to pull out all of the nails, sometimes sawing them off if they were stubborn, in order to free the planks on the pallet! Now take the sturdy frame of the once-pallet and use those 2x4s to make your own frame! Box shaped bottom, bracer in the middle, then upright posts at every corner and middle, but make sure one side is taller than the other by 6 inches to allow for a slanted roof to properly shed rain. Frame out the top as you did the bottom. Then take all of the blanks you removed from the pallets and use them to make a floor (unless you found sheets of plywood in someone's free bin, that would be lighter and better!) and walls, and roof. Use a nailgun to make this process faster! There will be some holes in between the boards, but try to get them as tight as possible, my chickens did not mind through the winter, and honestly I think a little fresh air kept them happier. I always made sure that they were toasty and cozy through the coldest days! For the back of the coop, we used a sheet of plywood that opened on a hinge, and hooked closed at both ends at hook and eye loops. Then you can clean it out and collect eggs easily. Don't forget a door, which is also easily made of plywood, hinge, and hook and eye closure!


These are the model plans we used to base out pallet coop off of! Since Brandan works at a sheet metal company, he was able to snag a piece of corrugated sheet metal for the roof, but you could use corrugated plastic for a cheaper option, or scout any metal manufacturer's recycle bin! For more plan details, click here, otherwise we used just the basic dimensions and replicated what we could.


A simple addition is feeder houses, which are useful for keeping food and oyster shells dry. They are simply made, and even the kiddos can help decorate!


This coop was free aside from the hinges and hook and eye closures. You might accrue a little more, but scout craigslist for awesome chicken run fencing, or any scrap wood if you don't have any free wood recycling bins nearby!

Happy henning!!!